It’s the last day of the Lisette B6169 drapey dress sew-along! If you’re just joining us, you’ll want to start at Day 1. Today we’ll be hemming the sleeve and the dress, and then you can wear it out tonight! I hope you’ll post photos of your finished dress to the SewLisette Flickr group. It’s always fun to see what you make with our patterns, and fellow sewists like to be inspired by your work too!
Here we go with just a few final steps.
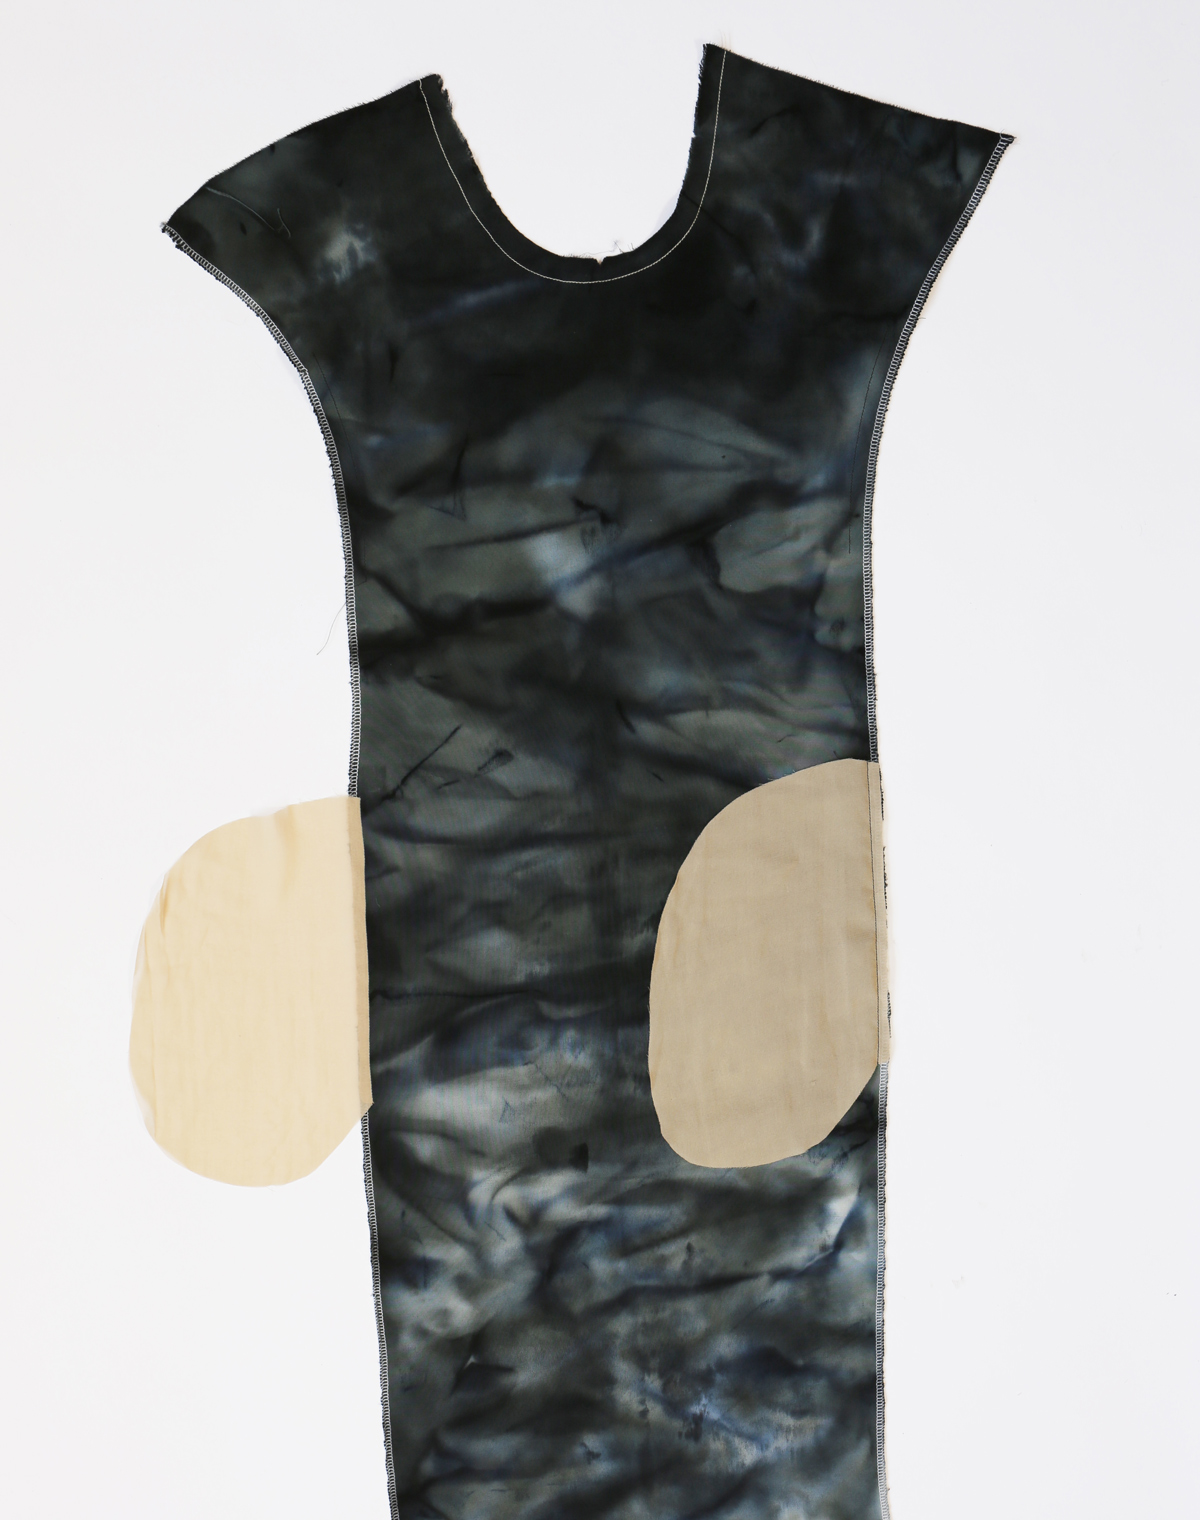
Hems
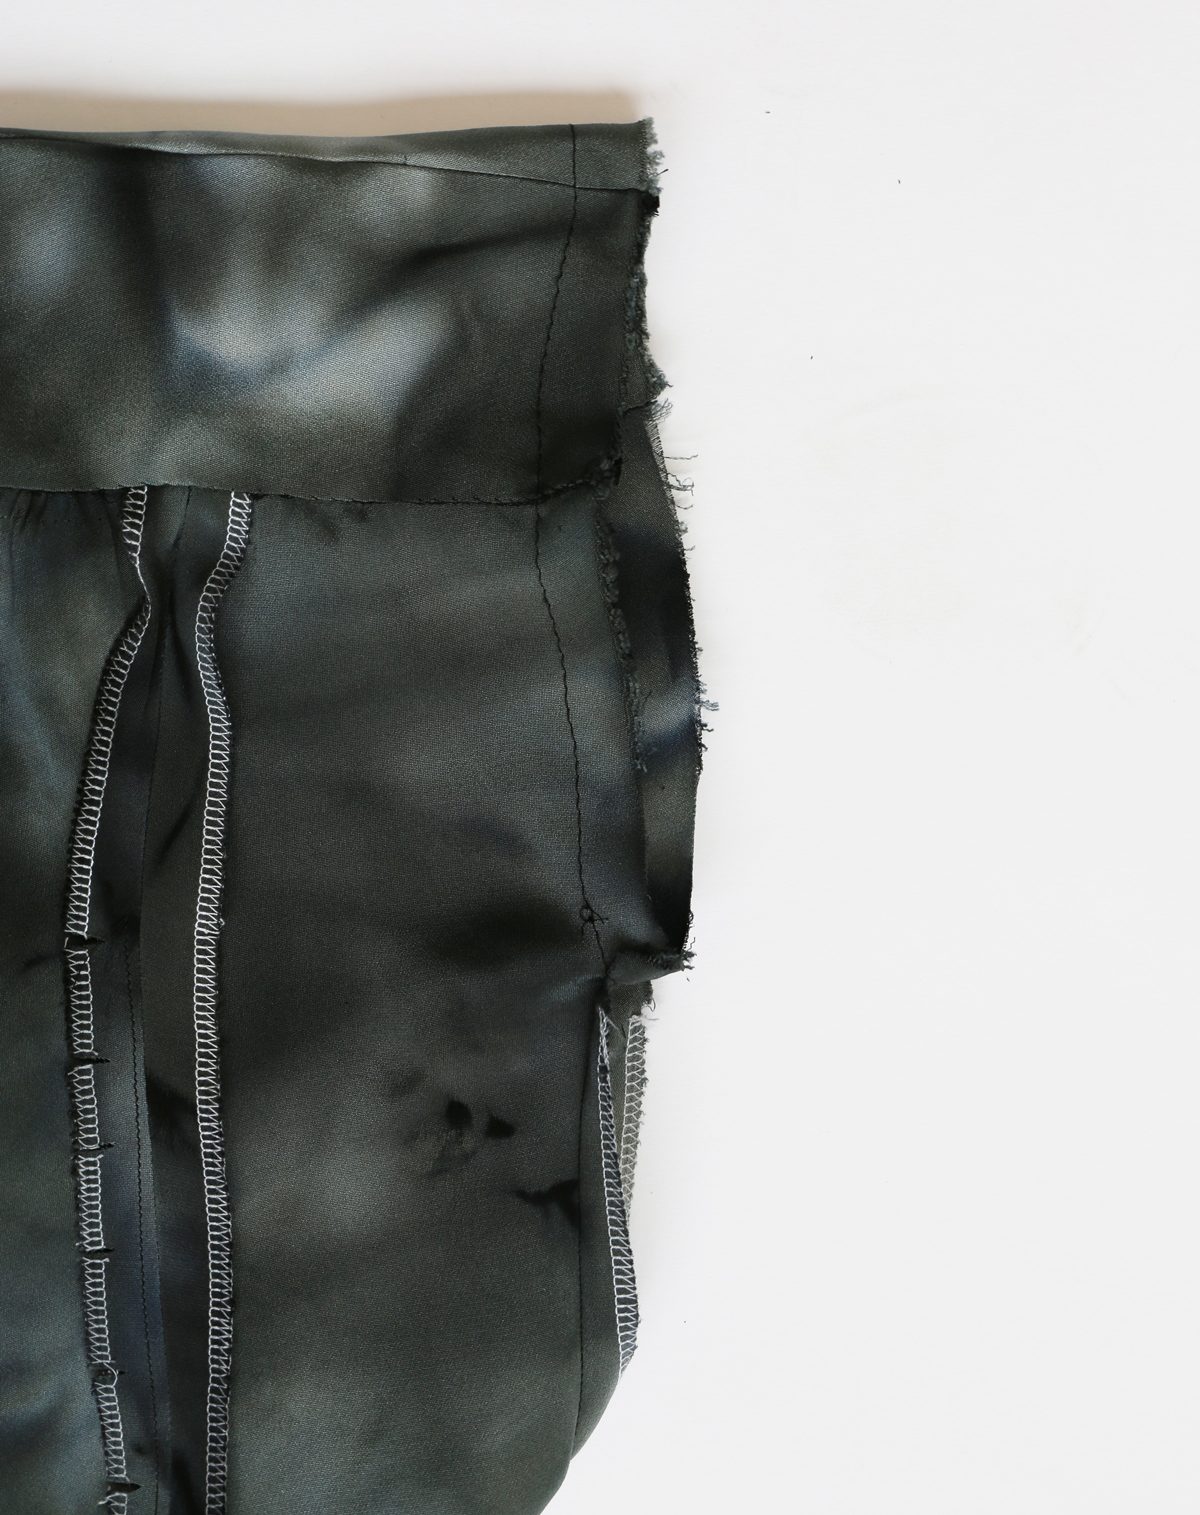
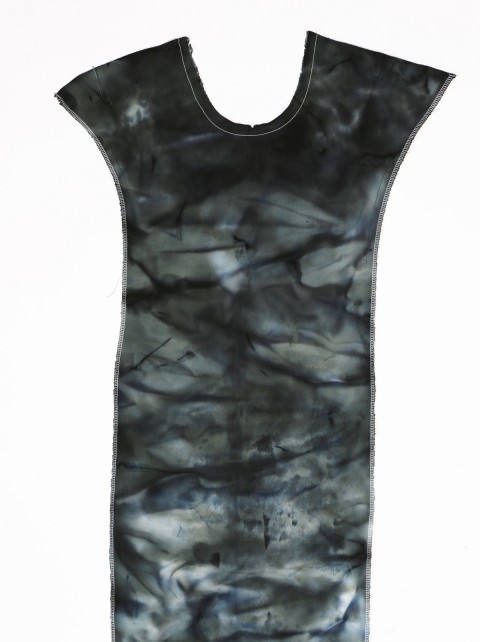
26. Finish armhole edges with a 5/8” (1.5cm) NARROW HEM, squaring stitching at square. (I added a row of basting stitches 5/8″ from the cut edge of the sleeve to help as a folding guide.)
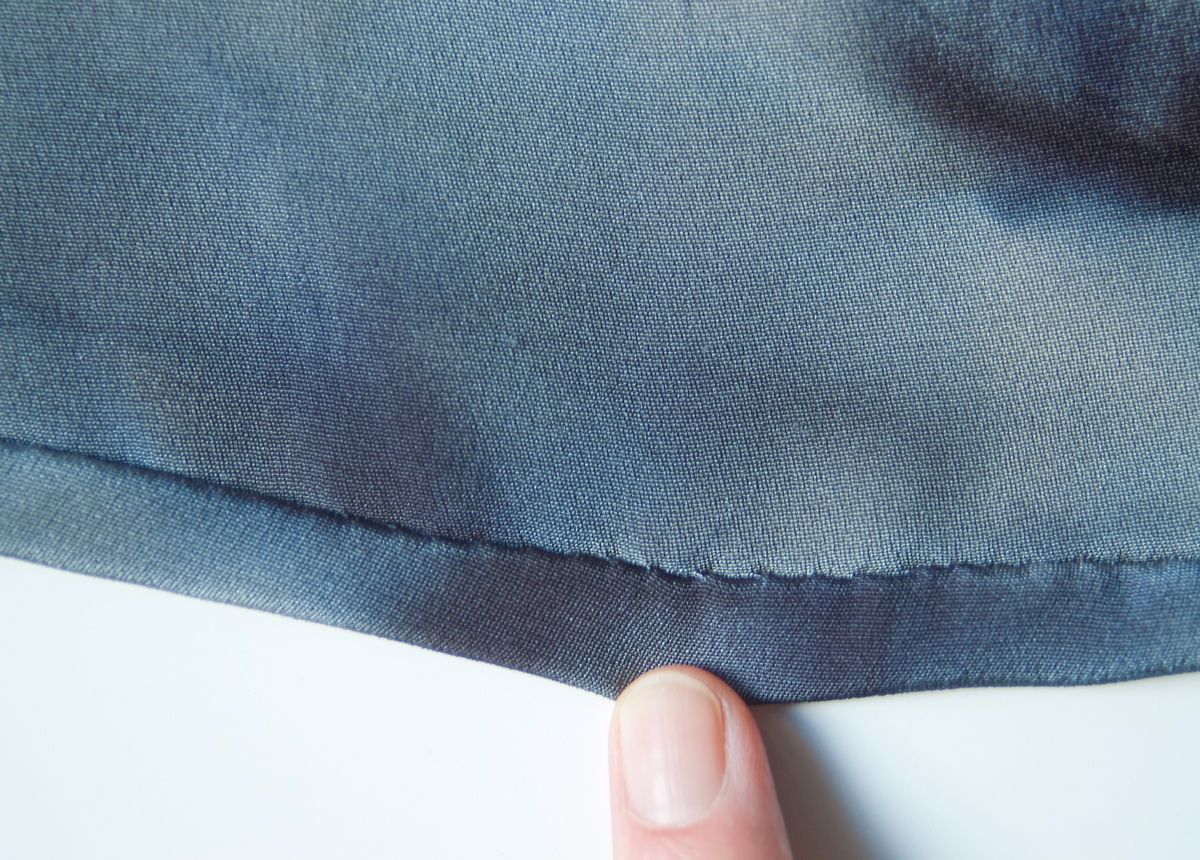
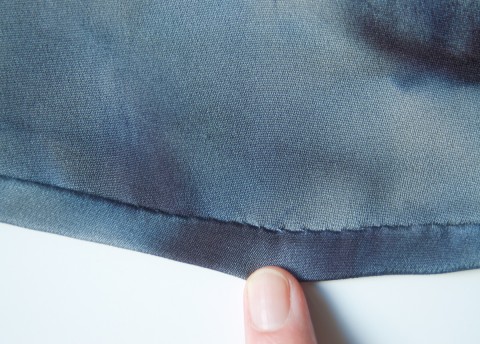
27. Stitch 1/4” (6mm) from lower edge of dress, using long machine stitches, as shown. Turn up a 5/8” (1.5cm) hem at lower edge of dress, turning under 1/4” (6mm) on raw edge. Pull thread to ease in fullness. Stitch. (Because of the thickness of my fabric, I chose to do a hand-rolled, hand-stitched hem. Again, do whatever works best for your fabric and your preferences. You’ll also notice in the last photo of this post that my finished hem is much longer than the original pattern, and I made it straight with side vents for walking ease.)
And here is my finished dress, complete with the vertiginous heels I wore to a fancy event last week.

I can’t wait to see how your dress turns out! Will you post a photo or two to the Flickr group?
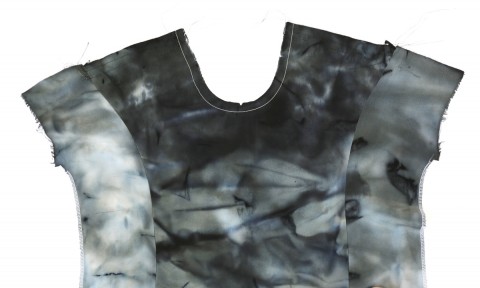
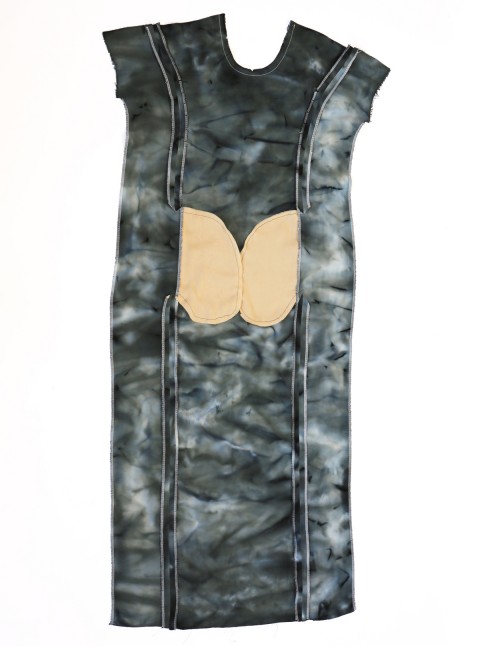
Welcome to Day 3 of the Lisette B6169 drapey dress sew-along. If you’re just joining us, you’ll want to start at Day 1. Today we’ll be finishing the yoke and the neckline.
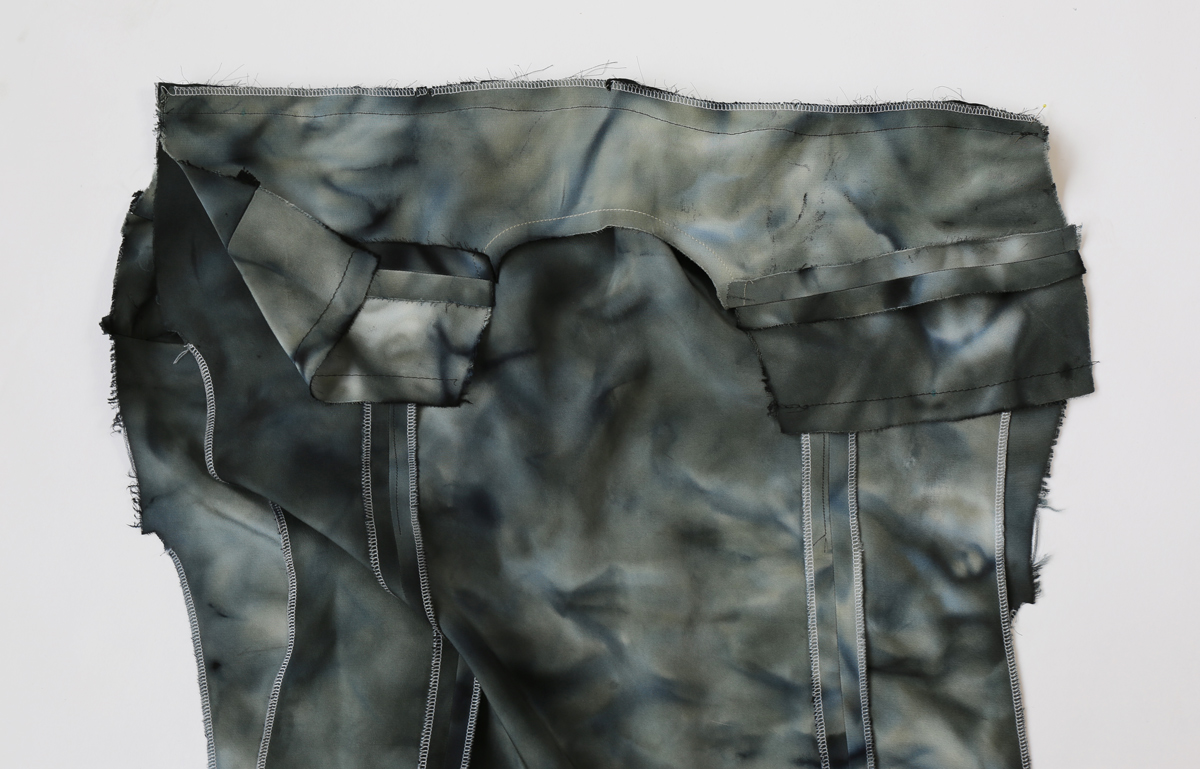
Yoke Facing
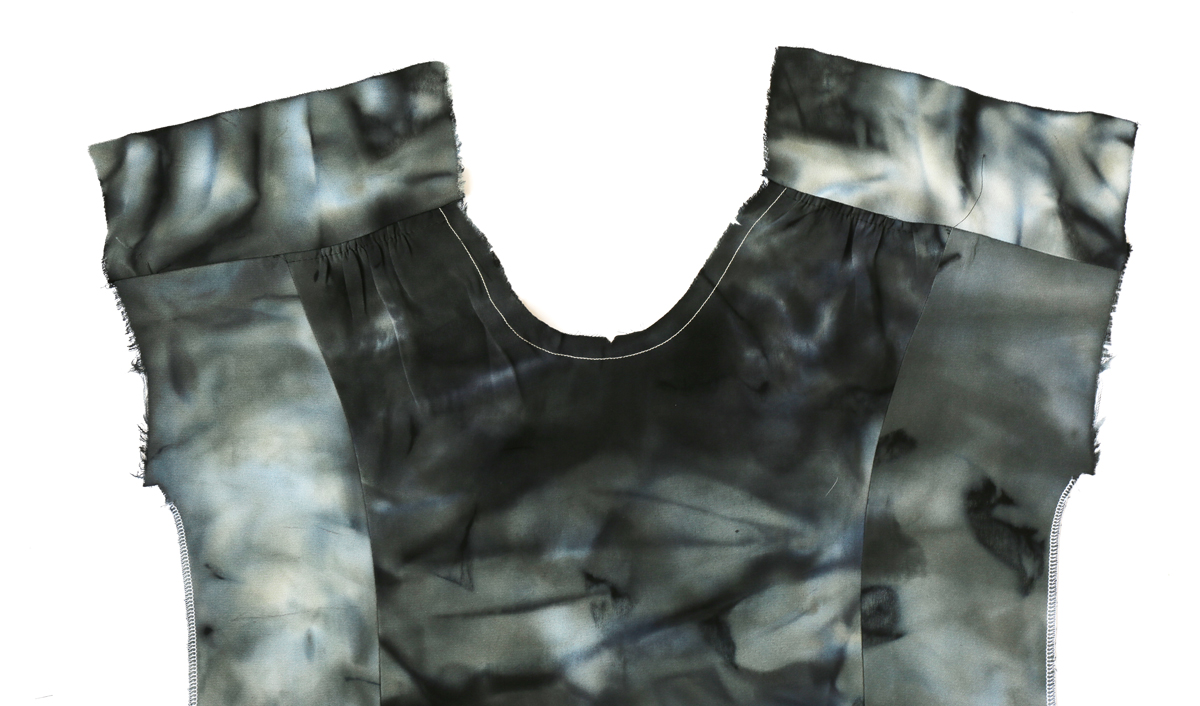
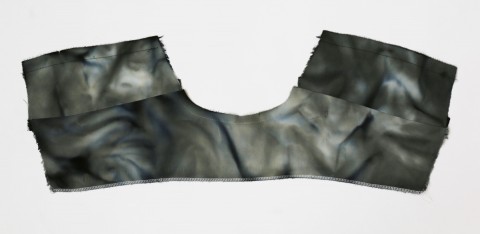
17. Stitch each yoke front FACING to yoke back FACING at shoulders. Press under 5/8” (1.5cm) on front edges of yoke facing. Trim pressed-under edge to 3/8” (1cm). (I like to use a basting stitch as my folding guide because it helps me to be really accurate, especially when I’m sewing with a slippery fabric. You can see my basting stitches at the top of the photo below. I waited to fold, press, and trim them until step 19, below.)
18. Pin right side of yoke back facing to wrong side of back, matching notches, centers and small circles. Stitch. Press yoke and yoke back facing away from back. (Here you’ve essentially sandwiched the front dress between the two front yokes and you’ll stitch right over your original stitching. This give the yoke a clean finish on the inside as well as the outside!)
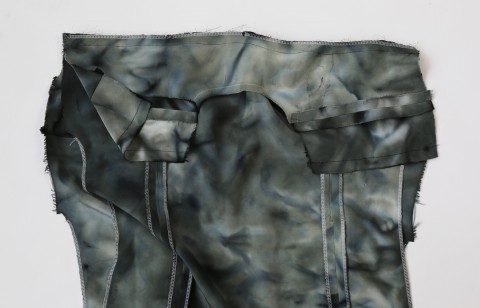
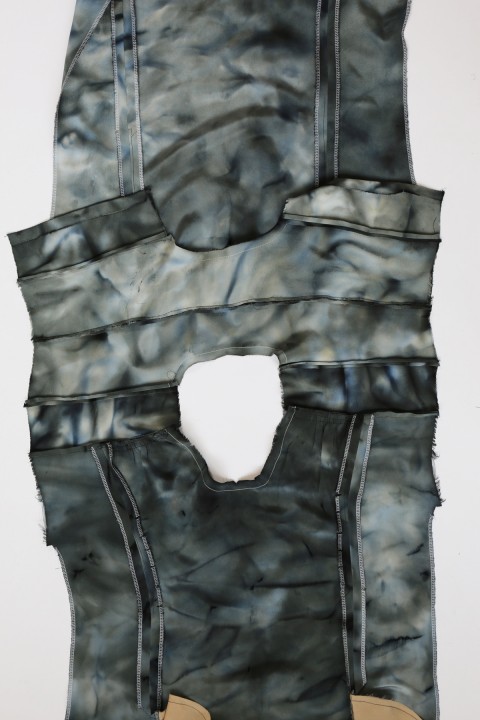
19. SLIPSTITCH pressed-under edges of yoke facing over front seams. Baste neck and armhole edges together. (If you prefer, you can use the burrito method to stitch this seam. I had already trimmed my seam allowances at this point, so I followed the method in the instructions and hand-stitched the facing. The advantage of hand stitching is that you have better control over the fabric so you can be sure the layers lie flat as you stitch them, and since my dress is fancy silk I wanted it to have a fancy finish as well.)
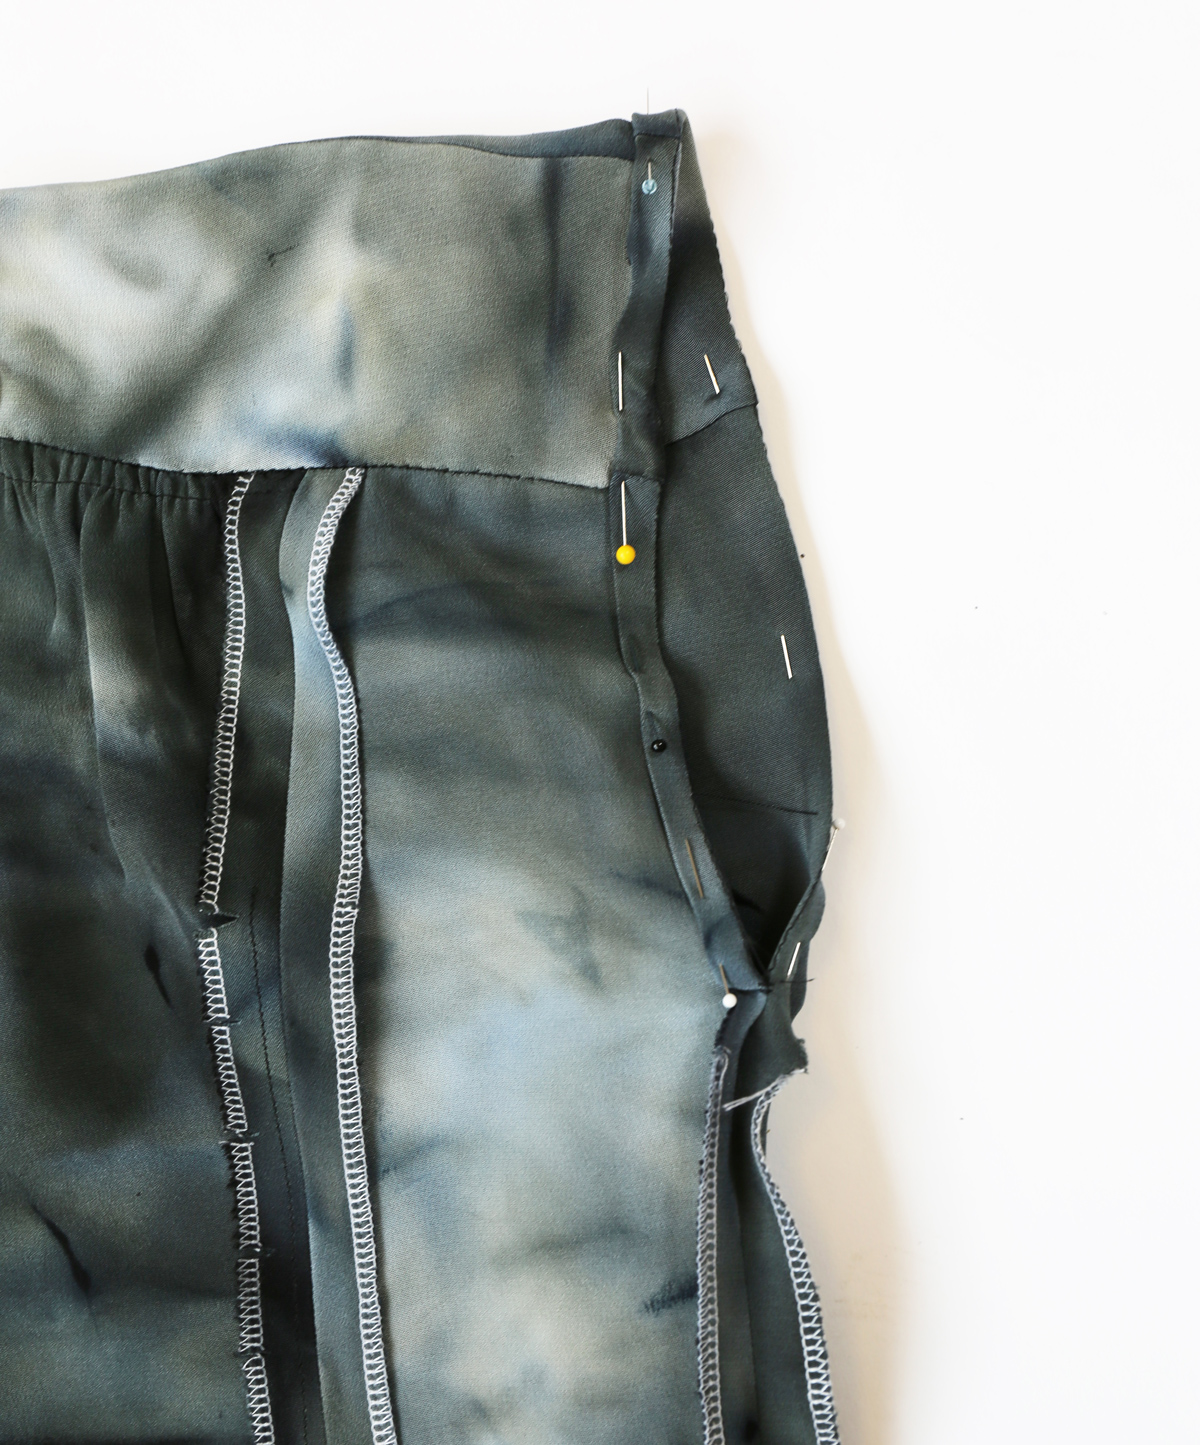
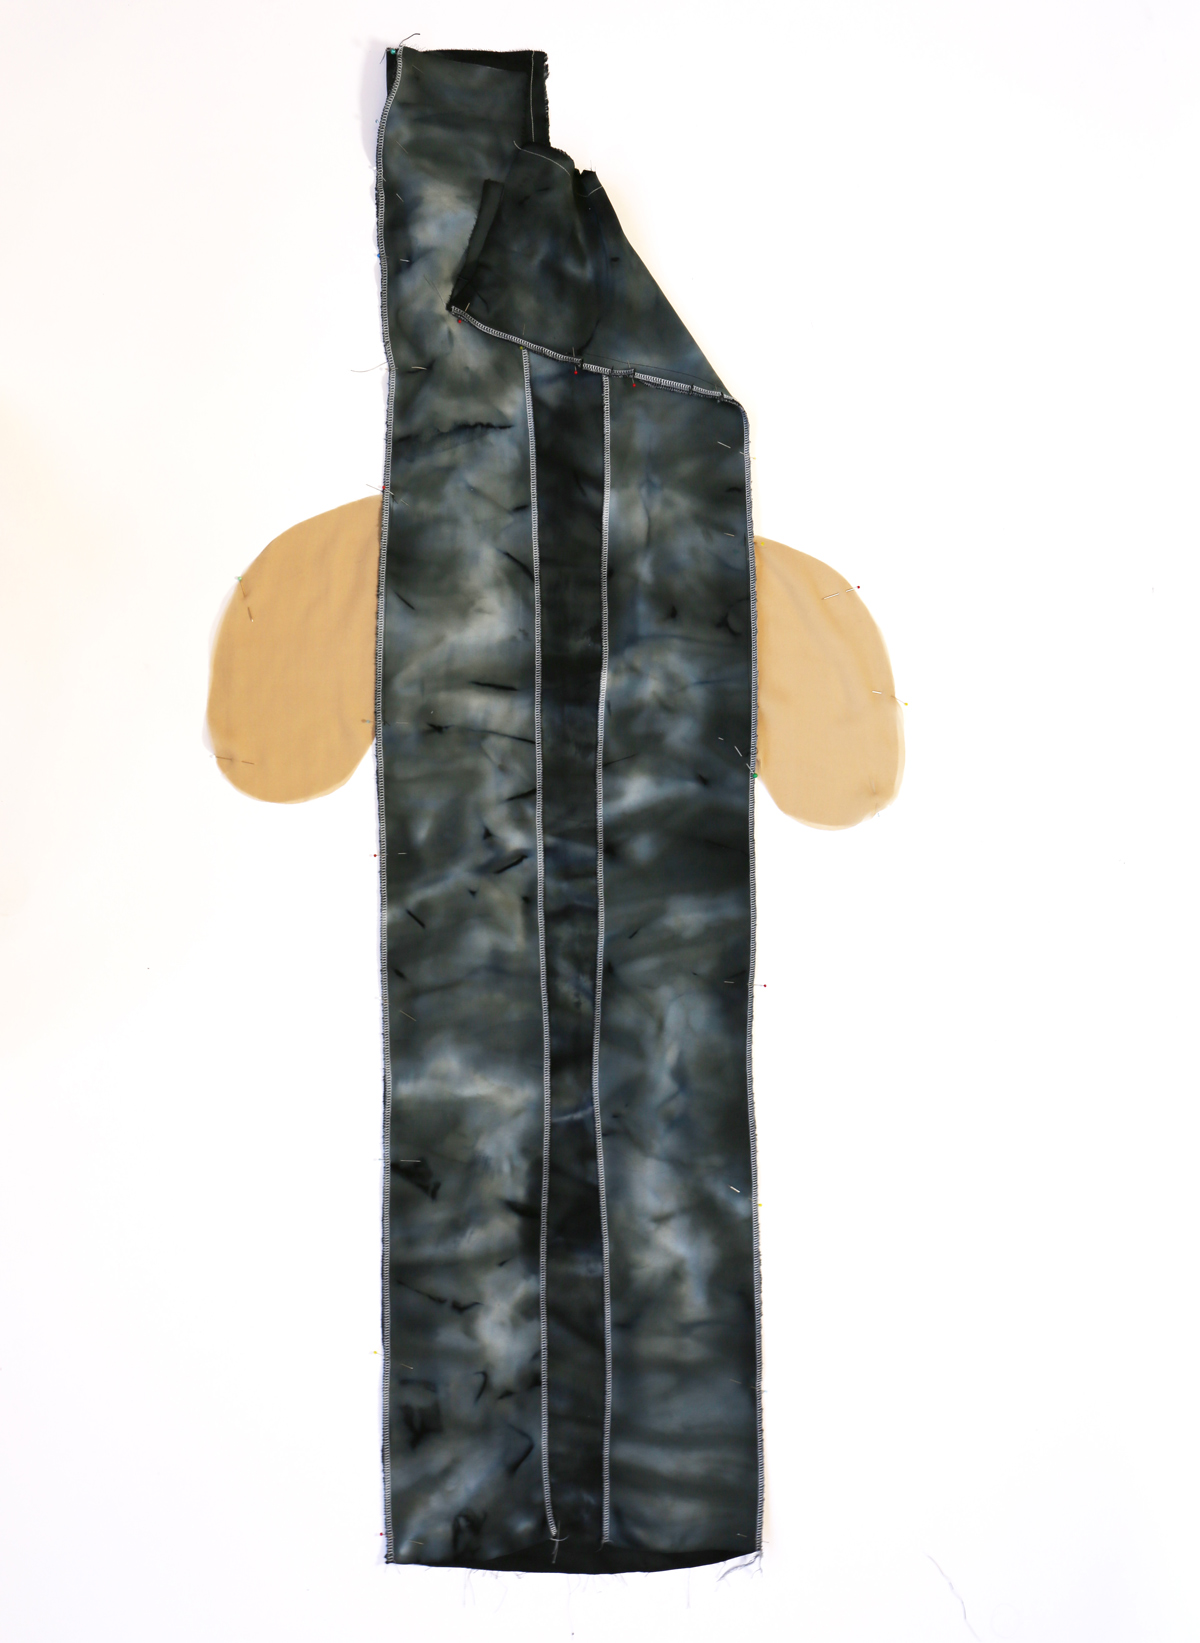
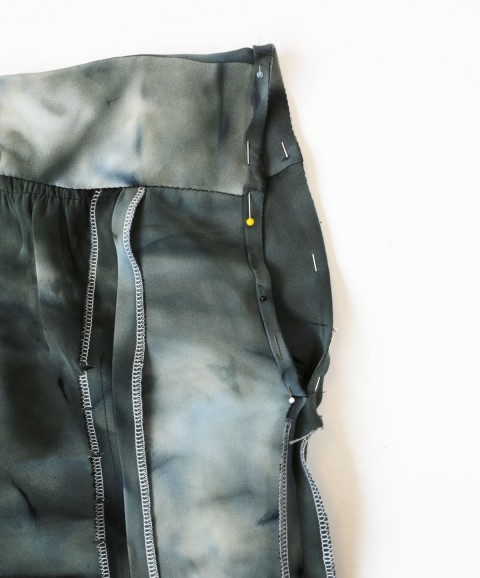
20. Stitch back to front at sides, from lower edge to square. (I left this until after I had finished the neckline because I find that it’s easier to work with the garment as flat as possible for as long as possible.)
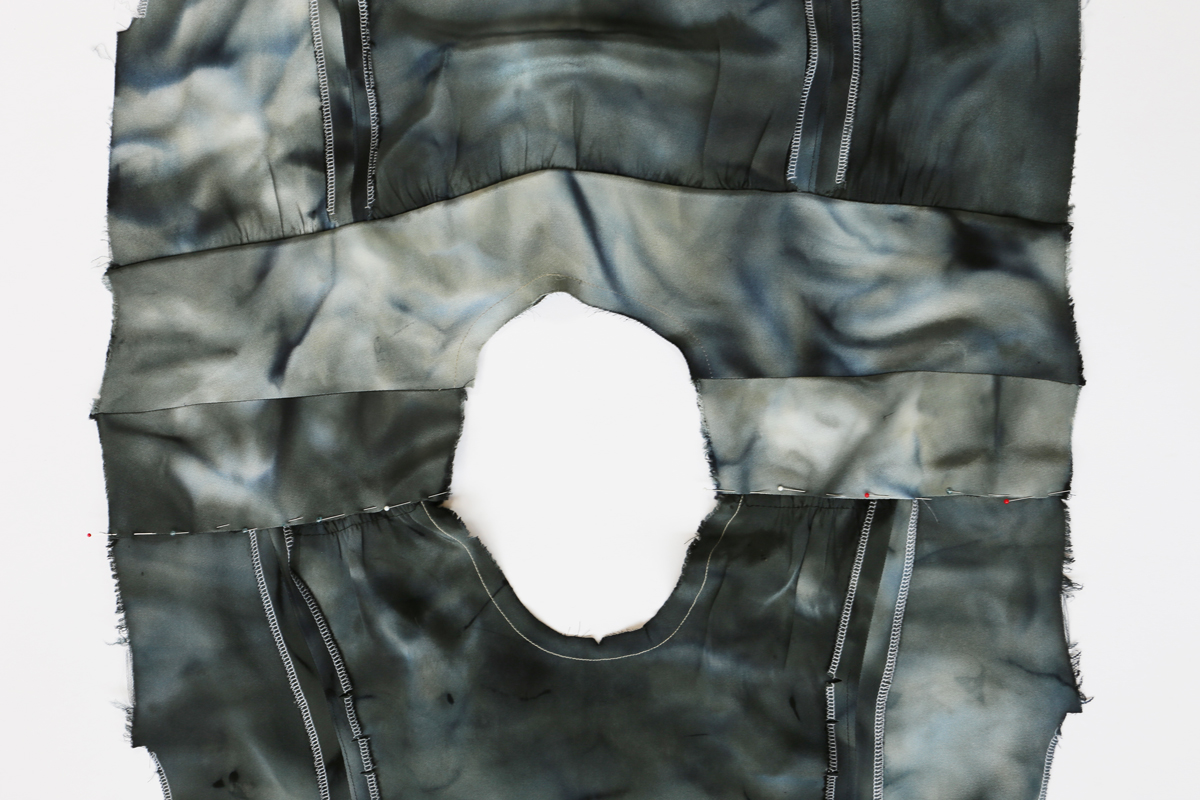
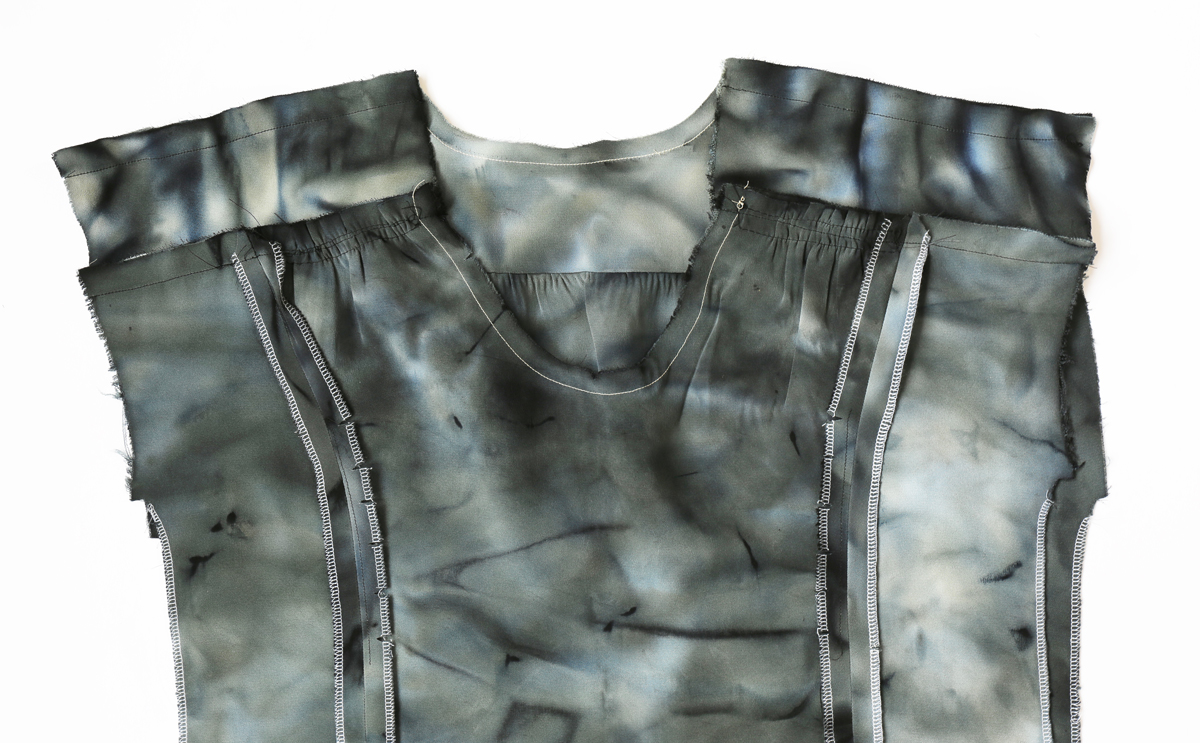
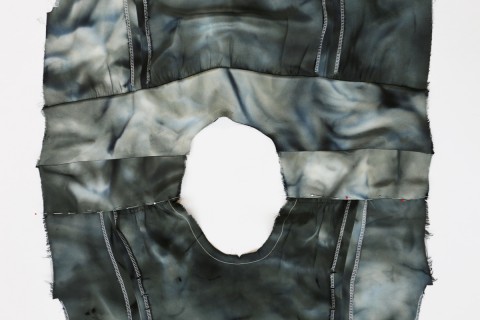
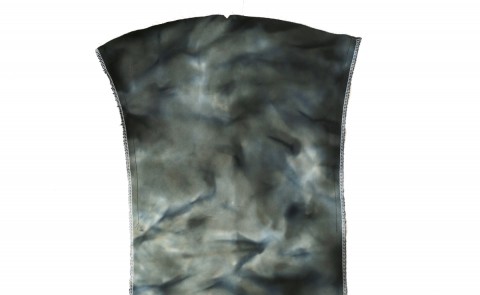
Neck Binding
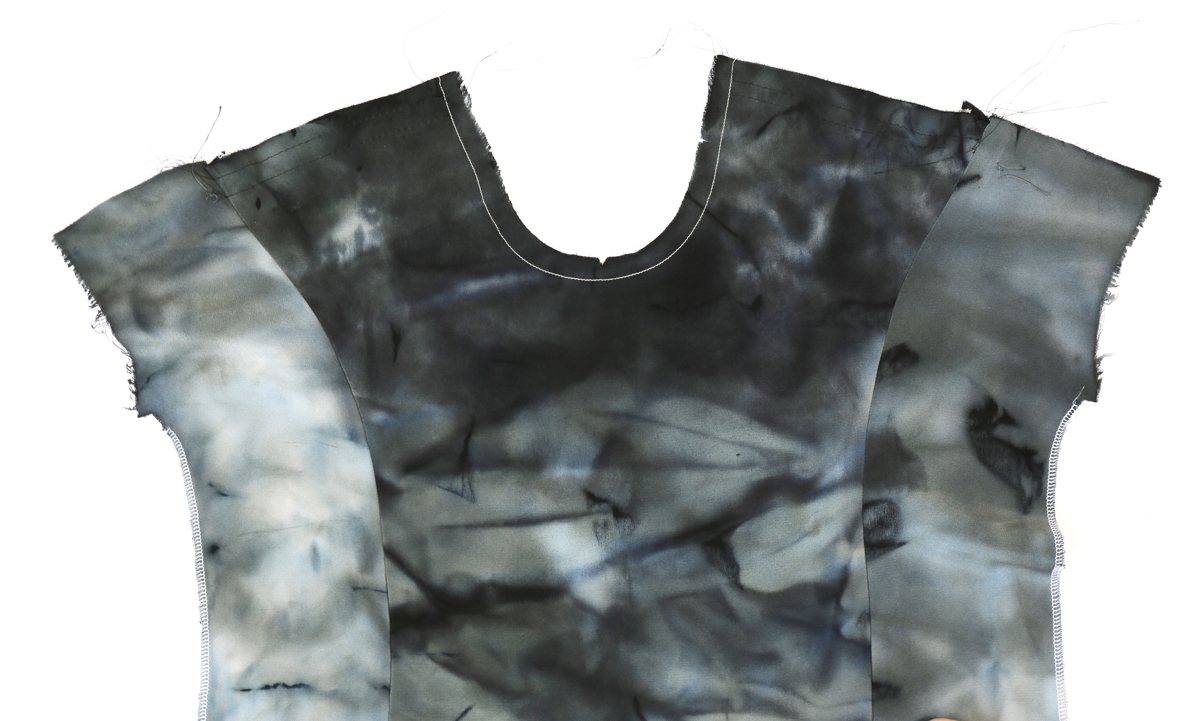
21. STAYSTITCH neck edge of dress. (This prevents it from stretching and distorting as you apply the binding in step 24.)
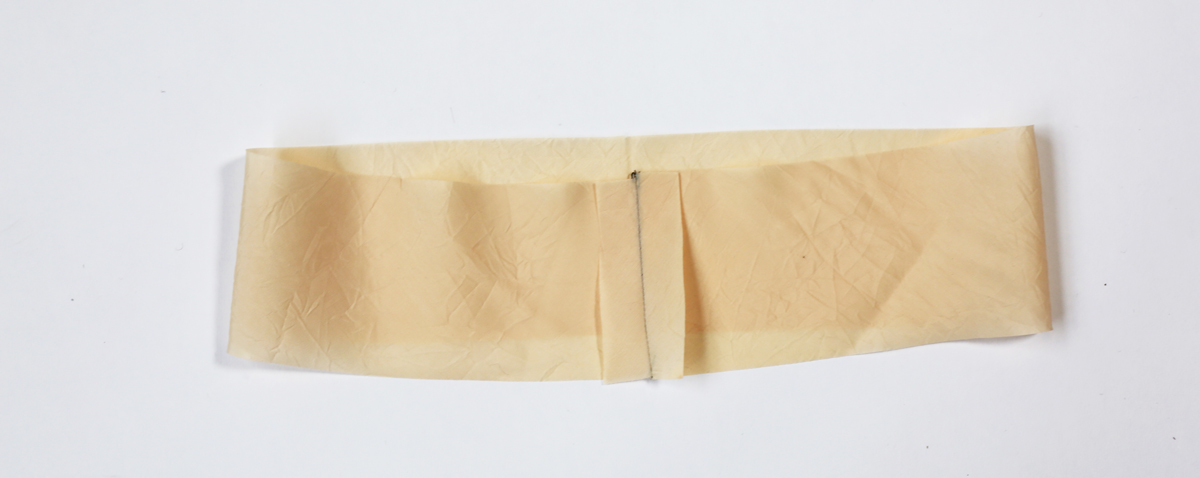
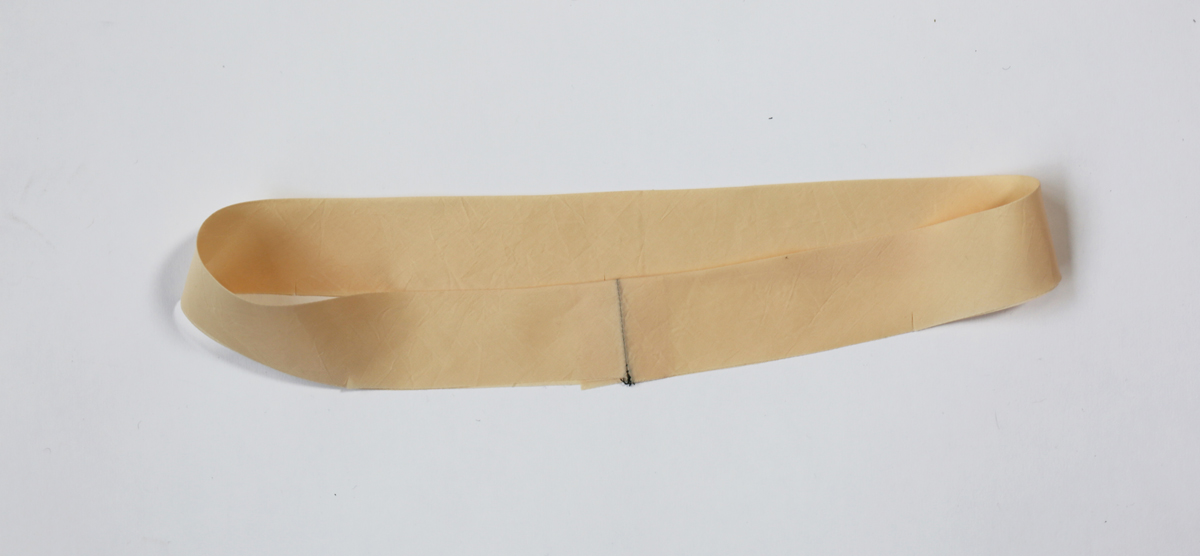
22. Stitch center back seam of NECK BINDING (19).

23. With wrong sides together, fold binding along roll line. Press lightly. Pin raw edges together.

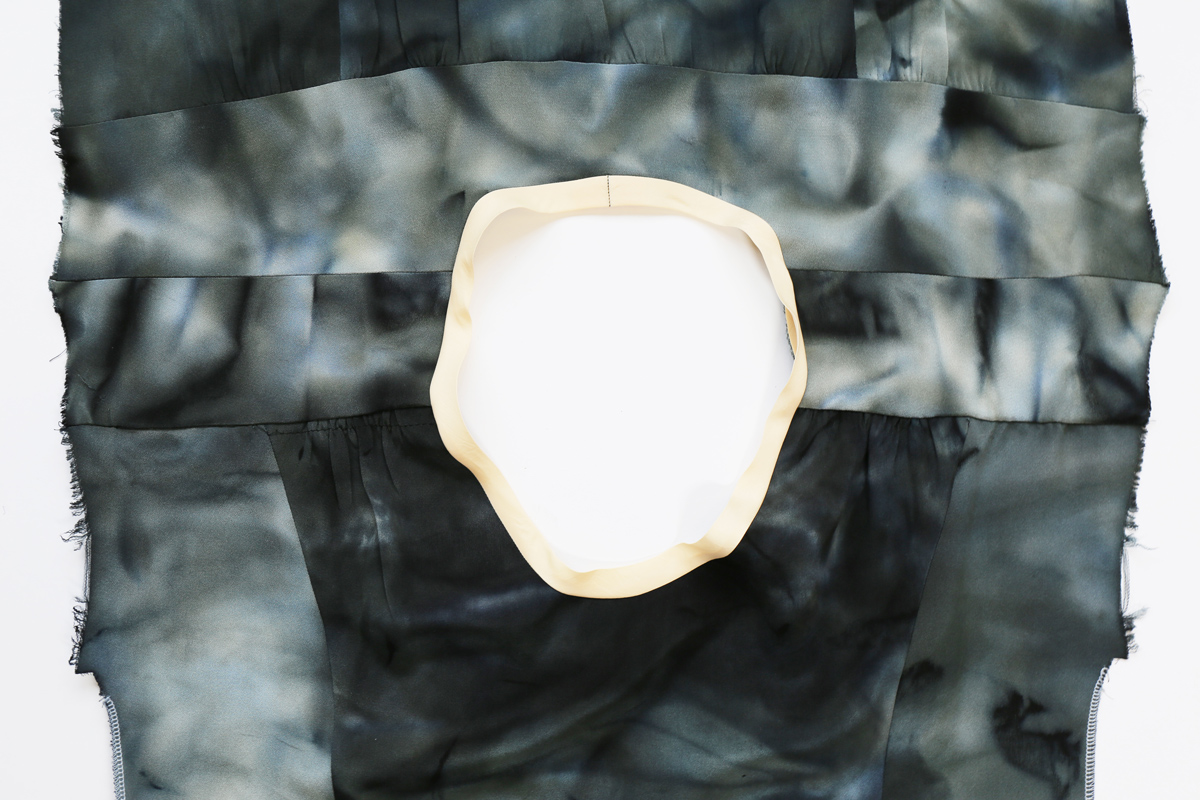
24. On outside, pin binding to neck edge, matching notches, centers and triangles. Stitch, stretching binding to fit. Trim seam allowances to a scant 1/4” (6mm). Turn seam allowances toward binding.

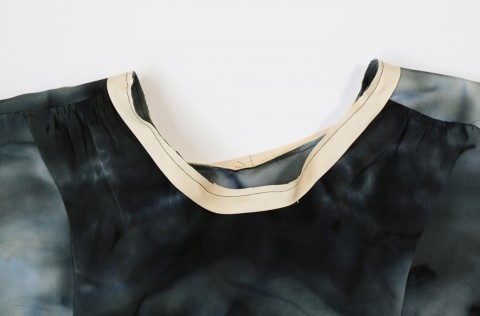
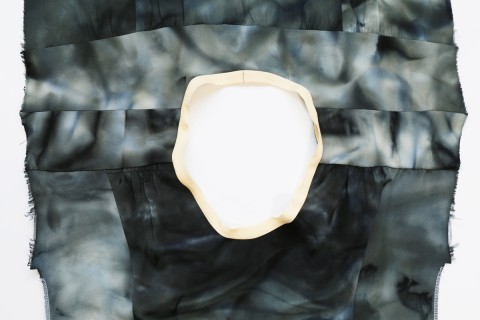
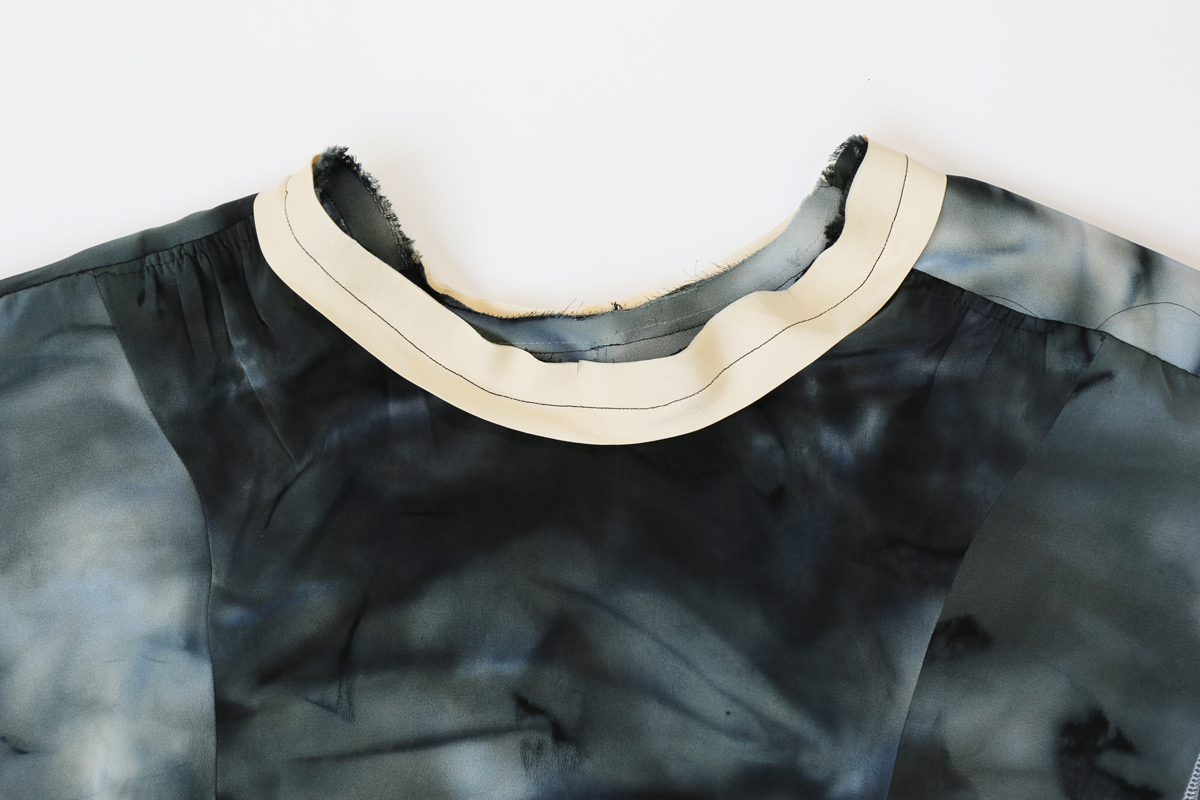
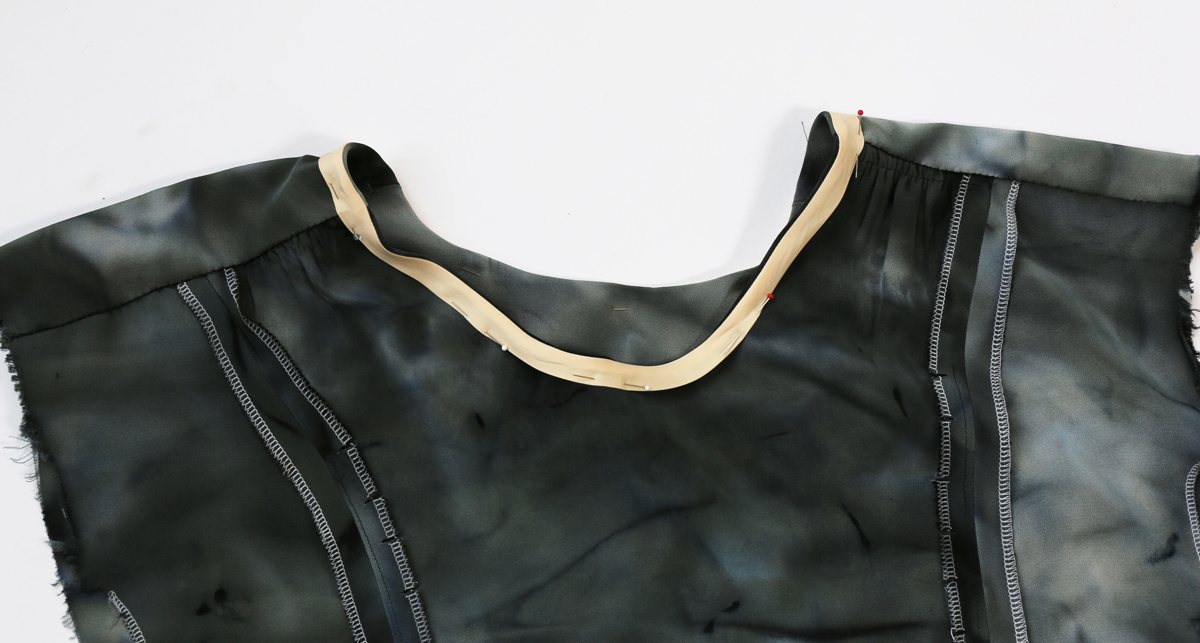
25. Turn binding to inside, encasing raw edges. SLIPSTITCH folded edge over seam, stretching binding to fit.
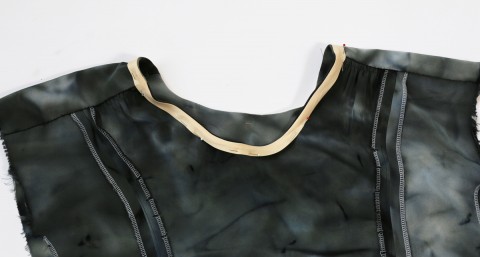
Do you like the clean finish of the neckline? Tomorrow we’ll finish up, hemming the sleeves and the dress.
Welcome to Day 3 of the Lisette B6169 drapey dress sew-along. If you’re just joining us, you’ll want to start at Day 1. Today we’ll be sewing the belt for View B. If you’re making View A you can sit back and relax and we’ll carry on tomorrow. Or you might want to consider making the belt and not attaching it so you can wear the dress with and without the belt for extra versatility? It’s up to you.
Since I didn’t make the belt, for my View A dress, I’m using the illustrations from the guidesheet today.
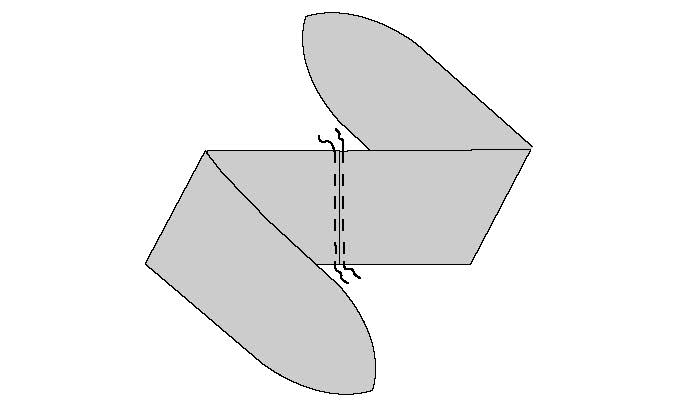
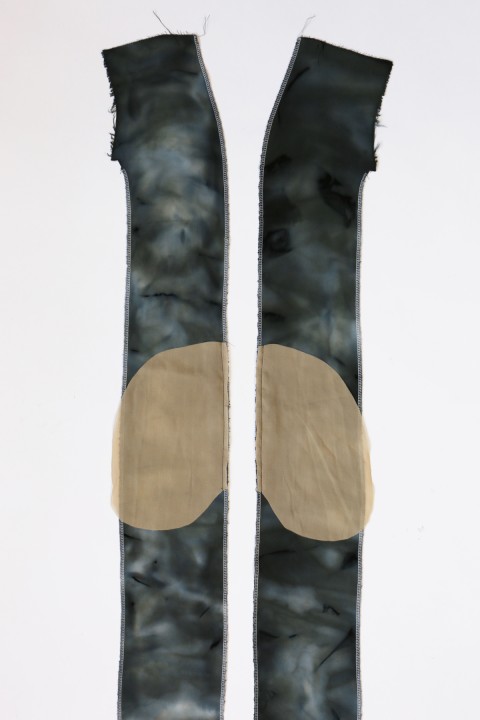
Tie Ends B
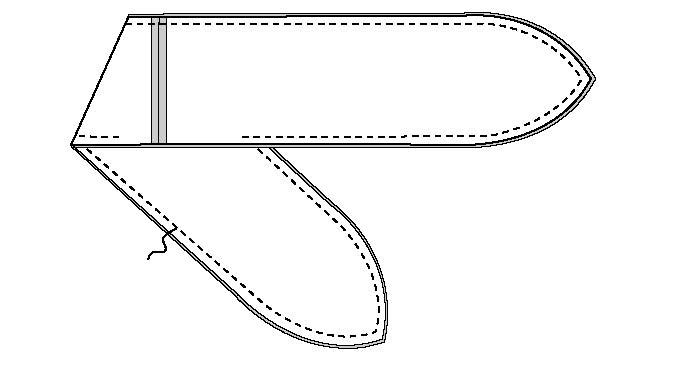
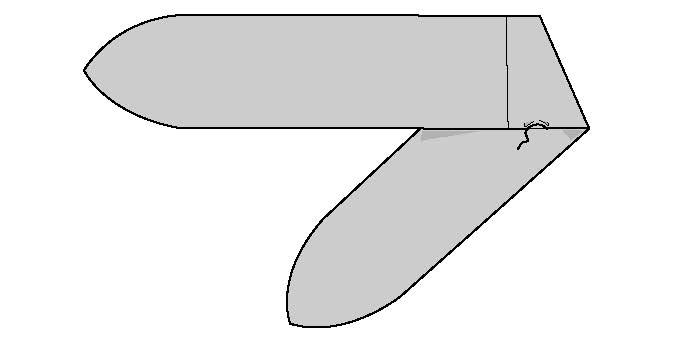
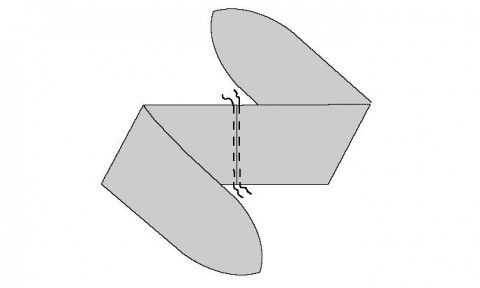
12. For each tie end, stitch two BELT (20) sections together at center back.
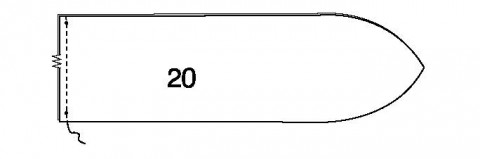
13. Pin belt sections, right sides together, matching seams. Stitch, leaving an opening for turning. Trim seam allowances. (Trim the corners, especially! I also find that it helps to press the seam allowances open as much as possible before tuning the belt right side out in the next step. If you have a wooden dowel, you can insert it into the belt and use it to help you press the seam allowances over the dowel. Once you’ve done this it’s a cinch to get a nice crease at the edge of the fabric in step 14, below.)

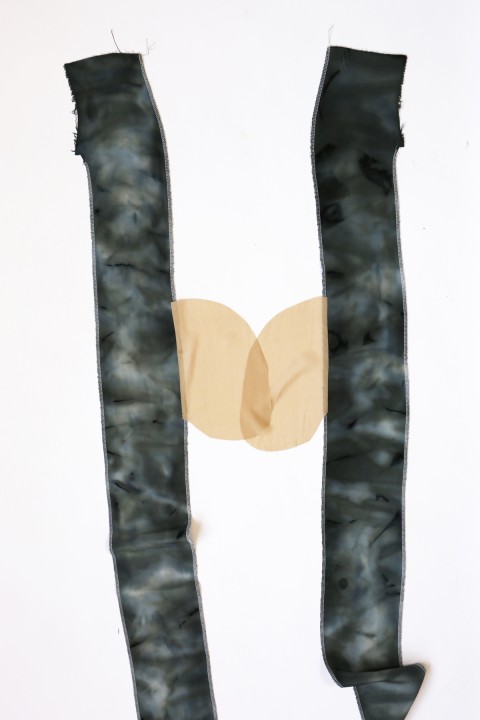
14. Turn right side out. Press. SLIPSTITCH opening edges together. (Use a point presser or a knitting needle to help coax those points to be nice and neat.)

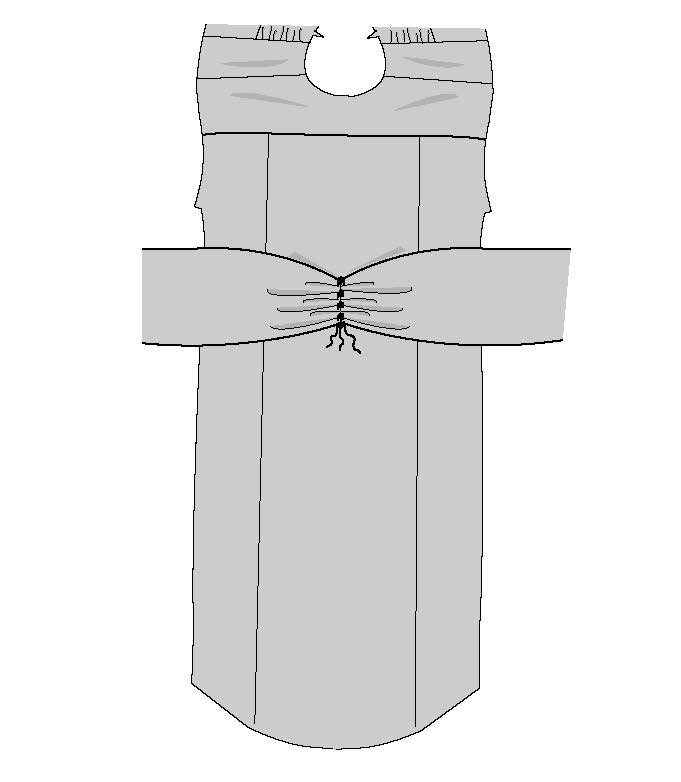
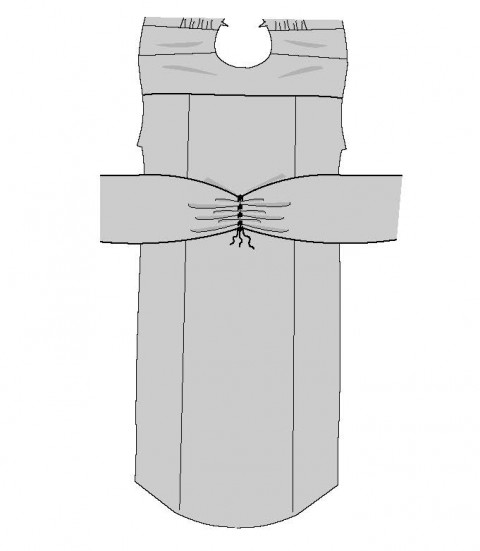
15. To gather belt, stitch 1/8” (3mm) on each side of seam, using long machine stitches.
16. On outside, pin belt to back, matching centers and small circles. Adjust gathers. Secure thread ends. Stitch belt to back along center back and gathering lines, through all thicknesses. (This keeps the belt in place and helps the gathers to be even when you tie it.)
 That was easy, right? Like I mentioned earlier, f you prefer you can always leave the belt unattached so you can wear the dress with or without the belt, but I think it looks really great when it’s attached.
Tomorrow we’ll finish the yoke and the neckline. I’ll see you then!
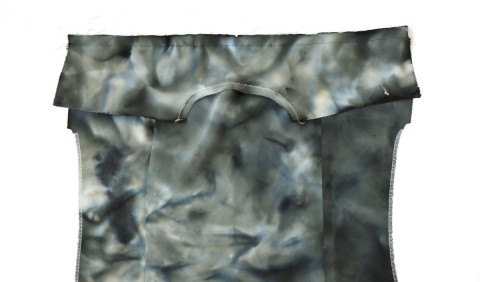
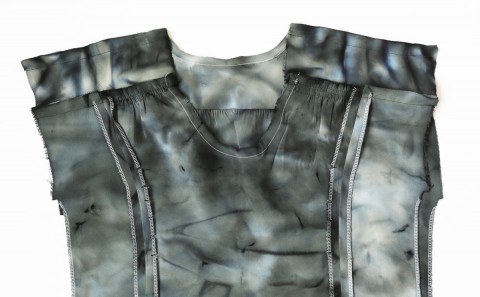
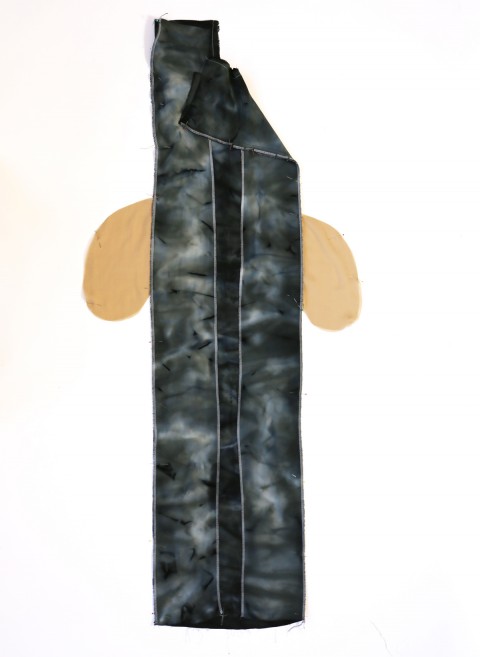
Welcome to Day 2 of the Lisette B6169 drapey dress sew-along. If you’re just joining us, you’ll want to start at Day 1. Today we’ll be finishing the dress front and assembling the dress back. These steps won’t take you very long at all. Ready?
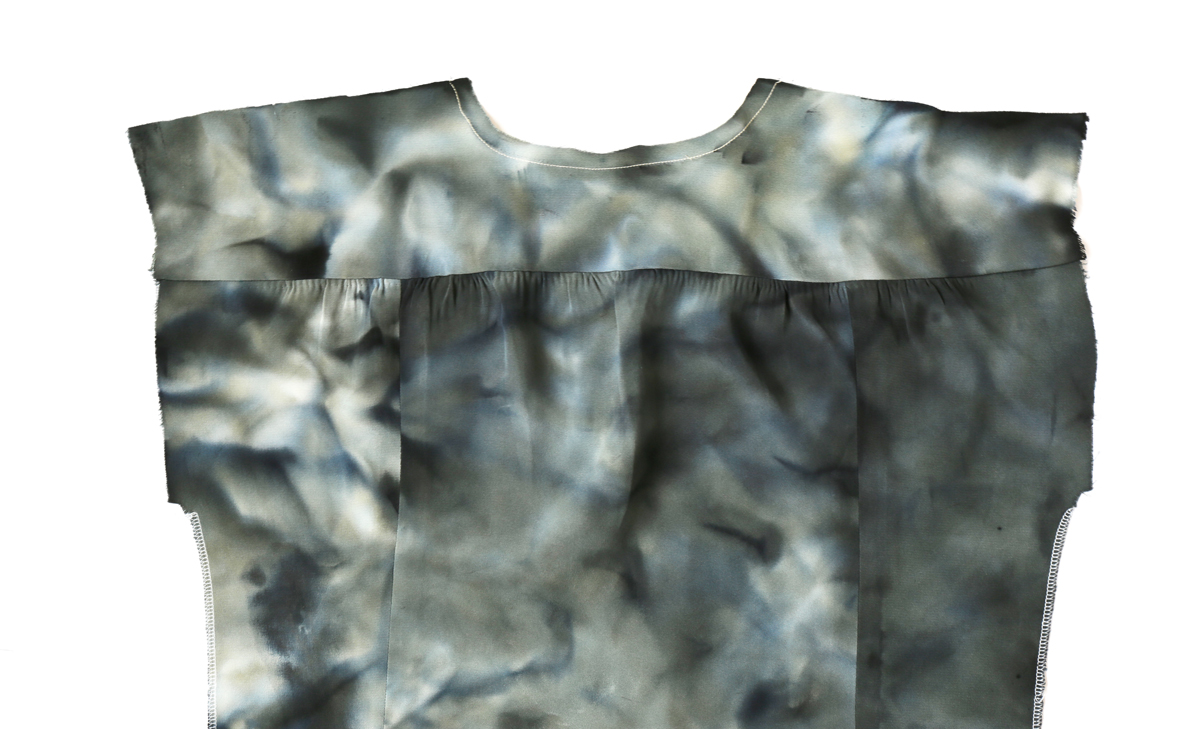
5. GATHER upper edge of front, from neck edge to small circle. (If you look closely you can see my gathering stitches at the shoulder of the center-front piece. I waited to gather them until I pinned the piece to the front yoke in the next step.)
6. Pin two YOKE FRONT (15) sections to front at upper edge, matching small circles. Adjust gathers. Baste. Stitch. Turn seam allowances toward yoke. (Remaining yoke front sections will be used as facing.)

Back
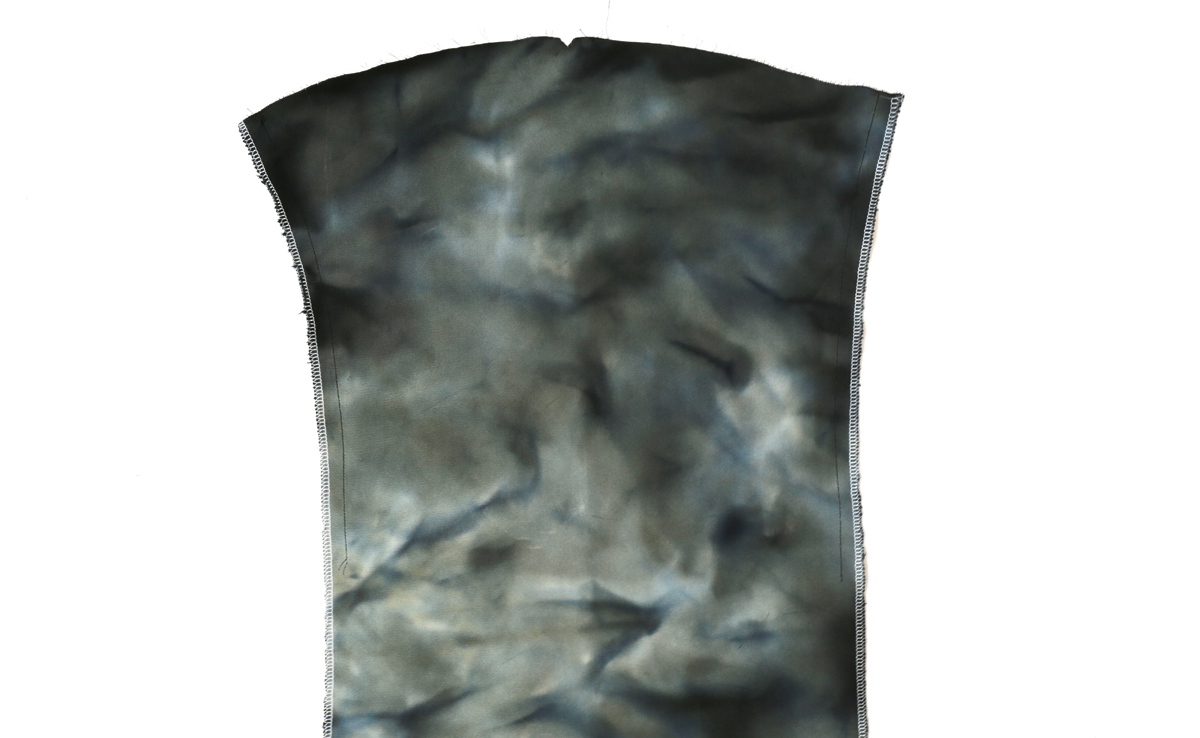
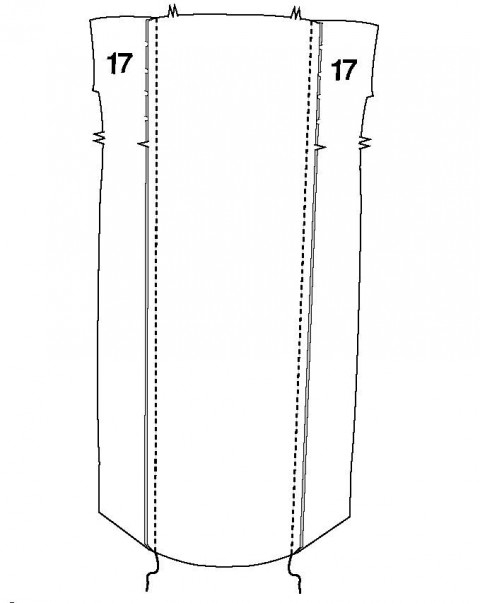
7. STAYSTITCH side back edges of BACK (16) above notches.(My staystitching is in black along the curved section of the piece, shown below.)
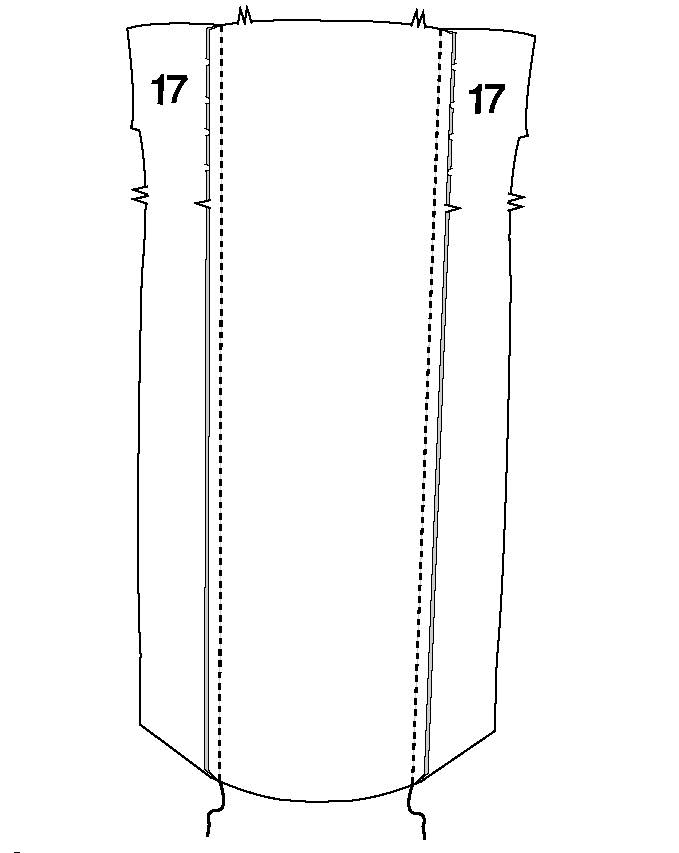
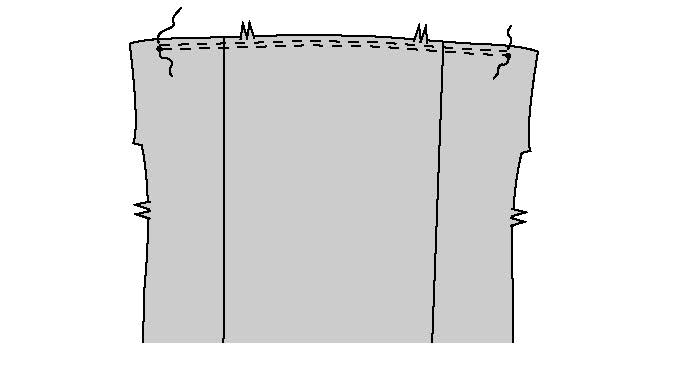
8. Stitch SIDE BACK (17) to side back edges of back, clipping back where necessary. (Somehow I forgot to photograph this step and the next! But the illustration is probably more clear anyway.)
9. GATHER upper edge of back between small circles. (Again, I waited to do the gathering until I pinned this to the back yoke in the next step.)
 10. Pin one YOKE BACK (18) section to back at upper edge, matching notches, centers and small circles. Adjust gathers. Baste. (Remaining yoke back section will be used as facing.)

11. Stitch back to front at shoulders.
And that’s it for today! Easy, right? Tomorrow we’ll sew the sash for View B. If you’re making View A you can sit back and relax.
Hello again, friends! Who’s sewing along with us this week? I love drapey dresses like this. They’re so easy to wear and so flattering on many different body types. I wore my finished dress to a fancy benefit last week and got lots of compliments. It was an easy dress to wear, too, because it’s comfortable even when you’re sitting at a long dinner and listening to speakers for several hours.

I talked about my fabric last Friday and want to remind you that I serged a lot of the edges of the fabric after I cut it out because I wanted to dye it and didn’t want it to ravel in the process. You’ll see my white serging through out the sew-along. If you want to serge your edges before you begin, feel free! I would suggest that you don’t serge the yoke edges or the top and bottom edges of the dress pieces (to reduce any unnecessary bulk), but otherwise pre-finishing your seams can save you time in construction. If you’re using a really lightweight fabric you could also consider French seams for the side and back seams, especially. This would give you a really neat finish where the inside of the fabric shows at the high-low hem, too.
Here is the daily plan for the sew-along:
- Day 1 (today): sew the pockets and assemble the dress front
- Day 2: finish the dress front and assemble the dress back
- Day 3: sew the belt for View B. (If you’re making View A you can take the day off!)
- Day 4: finish the yoke and the neckline
- Day 5: hem the sleeves and the dress. And then wear it! After all, Friday night is date night, right?
As always with our sew-alongs, I’ve added my notes and hints in parenthesis. Otherwise the instructions are the same as the guidesheet in the pattern.
Front
1. STAYSTITCH side front edges of FRONT (12) between upper two notches. (If you look really closely you can see my staystitches in black along the curved sides of the pattern piece.)
2. Stitch one POCKET (13) section to front and each SIDE FRONT (14) section at side front, taking up a 1/4” (6mm) seam allowance. Press seam allowances toward pockets. (Note: If you’re considering using a lighter-weight fabric for your pockets like I did, i would strongly suggest that you use matching fabric for the center front pockets. I learned, after my dress was finished, that the pockets can show when you sit down. I may go back and replace my pockets as a result, so I would suggest learning from my lesson.)
 These are the pockets that may show when you’re wearing the dress and you sit down, so you may want to consider using self fabric or matching fabric, unlike what I did.
 It’s ok to use a lightweight fabric for these because they won’t show.
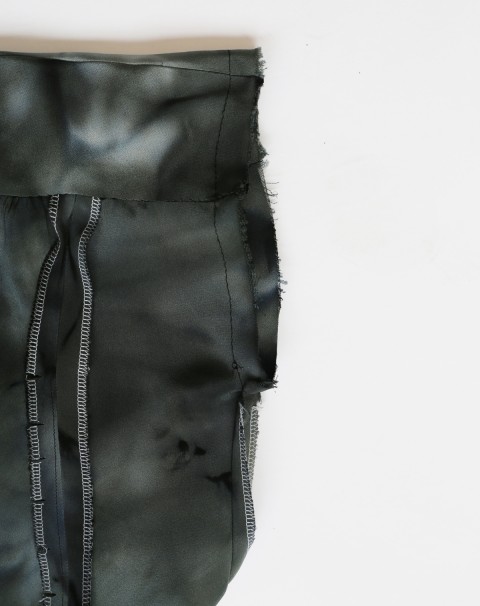
3. Pin side front to front at side front seam, matching notches and circles, clipping front where necessary. Stitch, leaving free between large circles. Stitch pocket edges together to side seams. Clip side front seam allowances above and below pockets. (Feel free to pivot at the circles in order to stitch around the pockets, sewing the entire seam in one go. You’ll see my clipping in the photo at step 4 below. I like to clip at an angle so the fabric doesn’t ravel.)
4. Turn pockets toward front along seamlines. Press.
 Really easy so far, right? Tomorrow we’ll attach the yoke and assemble the back of the dress. See you then!
Are you ready for Monday’s B6169 drapey dress sew-along? I certainly am! I’m excited to sew this dress with you.
Do you have your fabric ready and cut out? You might remember that fantastic celadon-colored 3-ply washed silk I purchased for this dress. It’s so luxurious, and I knew that I wanted to do something interesting with the fabric itself before I made the dress. So I used color remover to whiten the fabric, and then I cut out the pieces of my dress and serged the edges so I could dye each piece individually. (I didn’t have enough space to work with all 3 yards at once.)

I diluted black Jacquard silk dye significantly (probably a 10-15:1 ratio) and poured a little bit of the diluted dye into a rimmed baking sheet before I scrunched up each piece of fabric individually and let it sit in the baking sheet until it dried. (I actually slipped the baking sheet into the oven at a very low temperature to speed up the drying process, but an hour or two in the sun would work, too.) I did this twice with each fabric piece, one at a time, and I’m really thrilled with the result! The shades of color range from light gray to deep navy and black, with subtle bits of rich green thrown into the mix. And it doesn’t look too tie-dyed, which was what I wanted to avoid. (I wore this dress to a fancy benefit this week, so it couldn’t look too hippie. Although it was a party for artists….)
My only regret is that I serged each piece with white cotton thread, and the cotton doesn’t take silk dye, so my serged edges are a bit jarring next to the dark fabric. I didn’t know exactly what I was going to do with the dye, so it was difficult to choose a color in advance. You’ll see next week. It’s not awful, but I may still do something else with my seam allowances.
In any case, I’ll be here Monday, ready to sew with you. Have a great weekend!
← Older posts Newer posts →