Yet another Itinerary Dress from me this week.
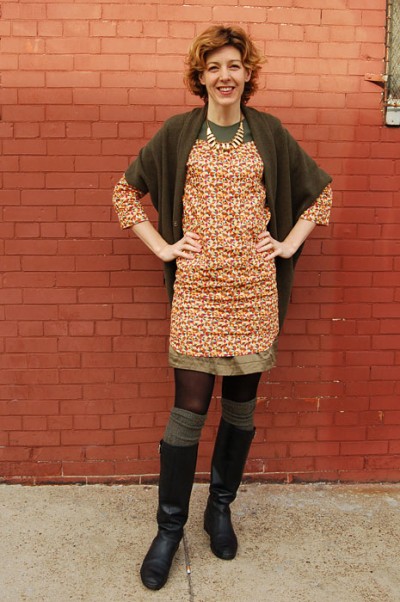
This is one of the samples I made when testing the pattern, and it’s a bit short for me because I didn’t lengthen it the way I usually do when I sew for myself. (I’m tall, and I need to lengthen everything I make.) I get around the length issue by wearing the dress with a little silk charmeuse skirt I made (I usually wear this skirt under another short dress I own, so I’m glad I can get lots of use from it) and with opaque tights, knee-high socks and boots.
Thank you for joining us for this first year with Lisette! To celebrate our first holiday season, we’ve made you a little gift.
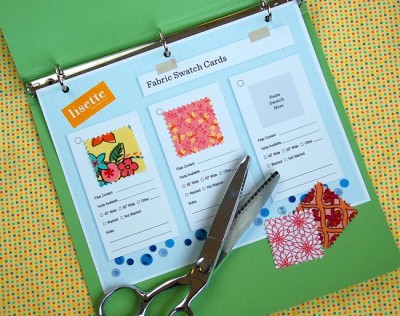
This swatch card set will help you to organize your fabrics. Print out as many as you like, and attach a swatch in the indicated spots to help you remember what fabric you own, how much of it, and to help with matching buttons or thread. You can either cut out the cards and attach them with a ring or put them in a 3-ring binder and take it along when you shop.
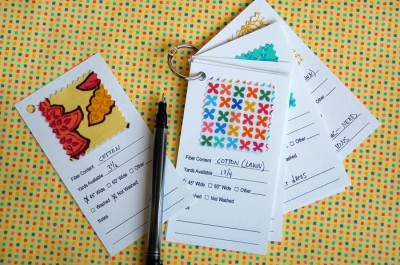
You can download the free PDF file from our website.
Either way you use them, we hope 2011 has been a great year for you, and we look forward to sewing with you more in 2012.
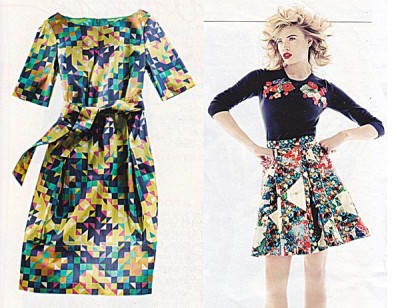
Maybe it’s because I designed a mosaic print for the current Lisette fabric collection, but I’ve been noticing a lot of mosaic prints in the fashion world lately. Here are a few that have caught my eye. I made a mosaic out of them!
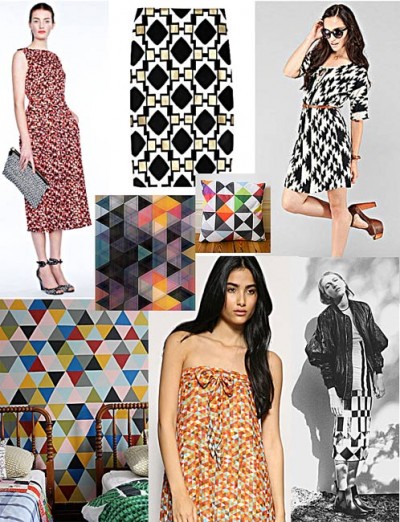
I think mosaic prints look great as a dress or a skirt, especially. They make a terrific, graphic print with lots of color that’s broken up so it’s not too overwhelming. Best of all these versatile multicolor prints can coordinate with many items and you can pick any color in the print to highlight with your accessories.
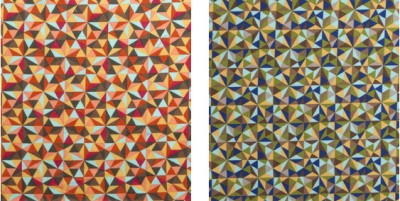
My personal favorite of the two Lisette mosaic prints is the warm-colored version with red and yellow. I like how it coordinates with my favorite warm-colored ikat print, too!
I’ll be wearing my mosaic print Itinerary Dress this Friday, so I’ll show you how I style it up!
For those of you who have the Itinerary Dress pattern, here is a fun way to take the obi belt pattern and dress it up for a holiday party.
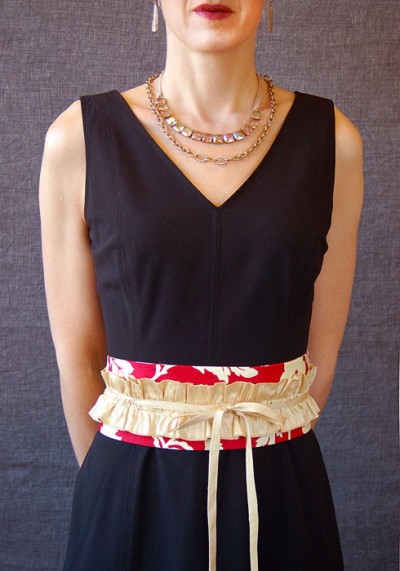
This belt is a great canvas for adding embellishment, so we made it fancy by making the base belt in a printed cotton sateen from the Lisette fabric collection and adding a ruffle of contrasting gold silk dupioni . It’s easy and fun! Here’s how to do it:
- To accommodate the ruffle we widened the belt just a bit adding 3/8″ all the way around the belt.
- Sew the belt according to the instructions, except do not do the topstitching.
- Cut a strip for the ruffle on the fold so it is 3 1/2″ wide (7″ wide when opened flat) and one and a half times the length of your finished belt. For example, the sample belt was 30″ long, so the ruffle length is 45″. You may need to piece your fabric together to get the right length (just be sure to add 1/2″ seam allowances on both pieces for joining strips). On the short ends of the belt you can round the corners (using your belt pattern piece as a guide) or leave them straight, whichever you prefer.
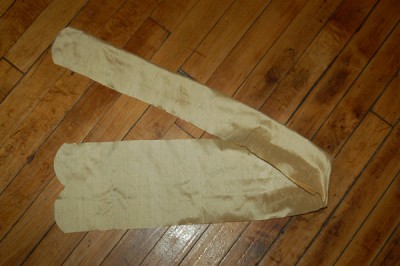
- With right sides together, sew a 1/2″ seam allowance around the open edges of the belt, leaving a 4″ opening on the long side of the ruffle for turning.
- If you rounded the short ends of your ruffle, clip around the curve. If you kept the short ends straight, trim the corners. Turn the ruffle right side out and press, folding the seam allowances at the opening inside the ruffle.
- Edgestitch the perimeter of the ruffle, 1/8″ from the edge. This will close up the opening left for turning. Press.
- Using a disappearing fabric marker or chalk marker, mark the midpoint of your ruffle and draw a line down the length of the ruffle. This should be approximate 1 3/8″ from your finished long sides. This will be the stitch guide for your gathering stitch. Sew a gathering stitch along the length of the center line. Be sure to leave long thread tails for gathering.
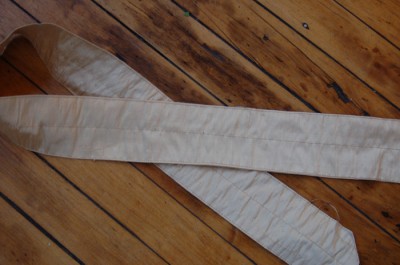
- Pull one thread on each end of the gathering stitches so that the strip begins to ruffle. Try to evenly space the gathers to avoid bunching.
- Lay the ruffle on the front side of your belt. Center it so that the ruffle is approximately 5/8″ from each long belt edge and 1/2″ from each short belt edge. Try to keep your gathering stitch line as straight as possible down the center. Pin the ruffle to the belt along the center gathering stitch line.
- Using the gathering stitch line as a guide, stitch two line of stitching 1/4″ from the center gathering stitch along the length of the ruffle. You now have two rows of stitching equal distance from the center gathering stitch.
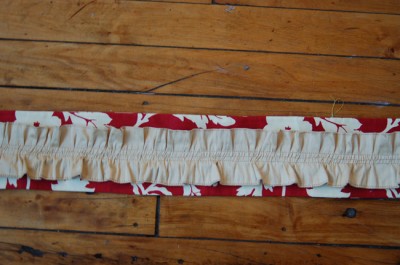
- Remove the gathering stitching in the center and the belt is finished.
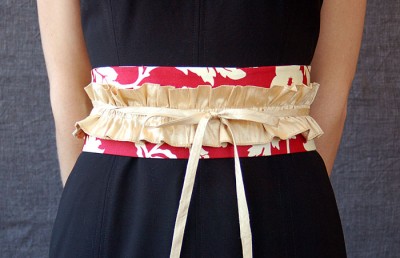
Happy holidays!
This week for Wear Your Style Friday I’m so pleased to introduce you to Jeanne. You may have seen some of Jeanne’s beautiful sewing in the Lisette Flickr group or maybe on her blog. She first posted her Continental Skirt in September and photographed it with a short-sleeved blouse.
Here’s what she has to say about it: “[This] Continental skirt was made using quilting cotton. It has been my go-to skirt this fall. It is such an easy skirt to wear and has proven to be a fabulous transition piece. Now that the colder December weather has finally made its way to Boston, my skirt has been a nice piece to use with layers. Today, I paired it with darker tones to help the orange in the skirt stand out more. To top it all off, I wore it with a hand knitted cowl to keep my neck toasty warm on this cold winter day.”
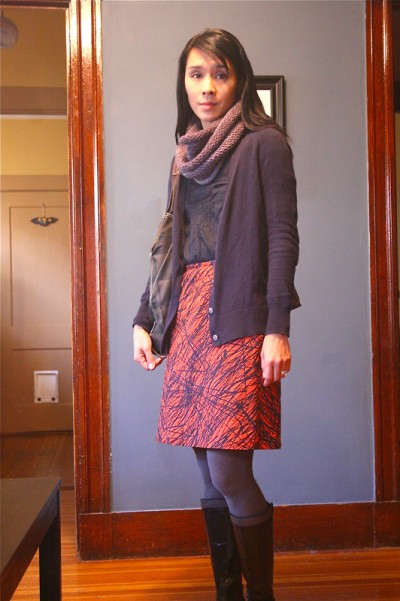 We love it, Jeanne! Thanks for showing us how you wear your style.
As we start the countdown to the holidays, I’ve been thinking about handy notions and tools to get for my sewing friends (and one or two for myself). Once you have the basic tools it’s nice to add a few key items to your sewing room. Here’s a list of our fave notions and tools for your sewing gift list:
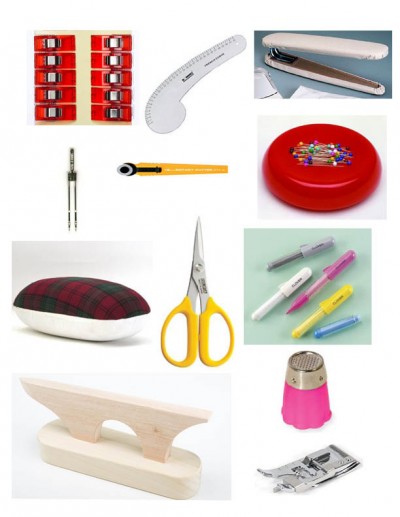
(starting at top left)
- Wonder Clips: These are the perfect alternative to pins to clip and sew heavier fabrics, multiple fabric layers, vinyl and leather, pile fabrics, quilt binding, piping, and more.
- French Curve: Use this ruler for making pattern alterations to curved pattern pieces such as necklines, armholes, and smoothly connecting curved lines. These are available in different sizes and in both clear plastic and metal. It’s handy to have a set of them for all your needs. Add a hip curve to your list to round out your pattern drafting ruler set.
- Sleeve Board: This mini ironing board is ideal for pressing sleeves, shoulders, zippers, or any hard to reach and small items. And it’s great for small sewing spaces!
- Twin Needle: Use a twin needle for a perfect double line of topstitching at hems. Often used with knits, the needles come in a variety of widths, and you’ll need two spools of matching thread plus bobbin thread for stitching.
- 18mm Rotary Cutter: A mini cutter is great for cutting small curved or intricate pieces and trimming seam allowances quickly and easily.
- Magnetic Pincushion: If you get pins all over the place, like I do, then you will love a magnetic pincushion. It makes pin cleanup a breeze and you will lose fewer pins.
- Pressing Ham: A ham is a must-have for pressing darts and curved seams.
- 5″ Precision Applique Scissors: This is a great scissor size to have between your embroidery scissors and sewing shears. They are very sharp and perfect for clipping seams, trimming seam allowances, and cutting small pattern pieces.
- Pen Style Chaco Liner: With the ease of a pen, this liner makes a fine line of powdered chalk for transferring pattern markings, labeling pattern pieces, and tracing templates. They come in a variety of colors and the chalk easily brushes away.
- Point Presser and Clapper: This classic pressing tool makes pressing points in narrow spaces, collars, cuffs, and corners a breeze. Use the clapper to flatten bulky seams.
- Protect and Grip Thimble: Handsewing enthusiasts will love this handy thimble. It has a metal tip and rubber body so it’s comfortable to wear and gets the job done.
- Edgestitch Foot: If your edgestitching is never as straight as it should be (like mine), an edgestitch sewing machine foot could be your new best friend. You can also use it to stitch-in-the-ditch, make pintucks and pleats, and sew applique stitching.
Look for these items in your local fabric store. Tell us what’s on your sewing wish list this season and let us know your favorite notions and tools!
← Older posts Newer posts →
