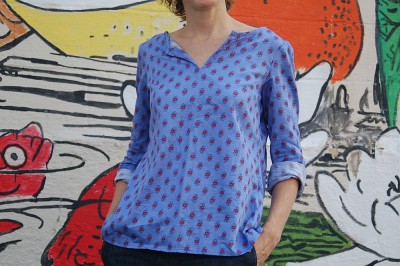
Once you know the basics about sewing, it’s quite easy to make little changes and tweaks to a pattern to customize it. I showed you my casual version of the Continental Blouse a while ago. Now I’ll show you how I made it so you can do it too.
First of all, when I was cutting out my basic pieces, I added 2″ to the length of the blouse. I’m tall, and since all Simplicity patterns are developed for a woman who is 5’6″, I usually add a little length to accommodate my height. However, now that the blouse is finished, I’m tempted to shorten it a bit, so next time I’ll only add 1/2″ and I think that will be exactly the length I want.
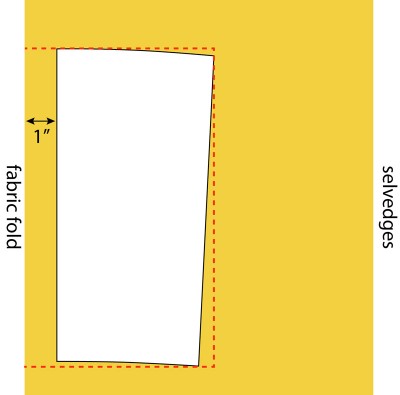
I also added a little fullness to the ruffle at the back by positioning the fold line of the pattern piece 1″ from the fold and cutting the ruffle as a rectangle instead of tapered, like the pattern piece itself. This just gives the back a little extra sweep and drama and loosens up the fit a bit at the same time.
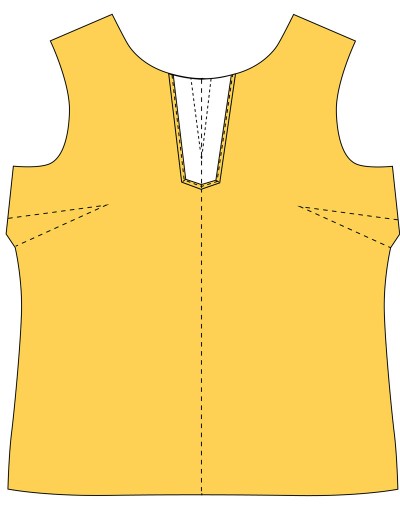
Then I added a long V at the front neckline. In order to do this, I made a simple facing for the front of the blouse. Here’s how to do it yourself:
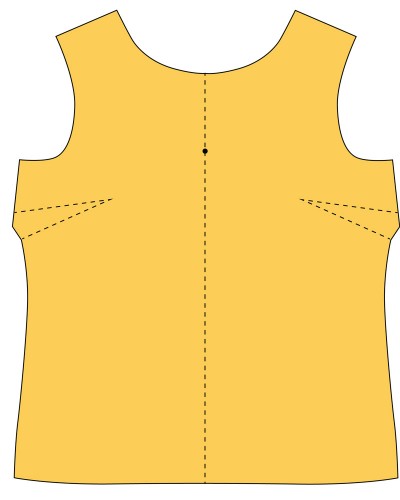
1. Find and mark the center fold on the front blouse piece. Then decide how deep to make your V. (I made mine 5″, not including the seam allowances, just for a general reference.)
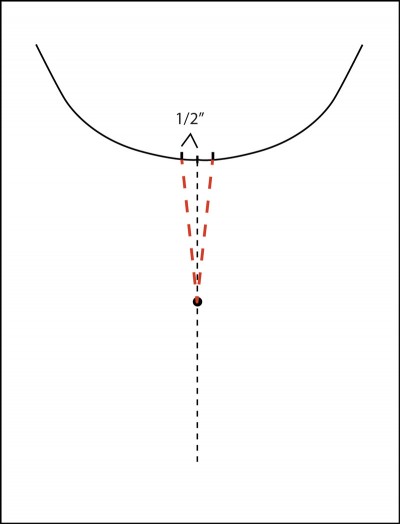
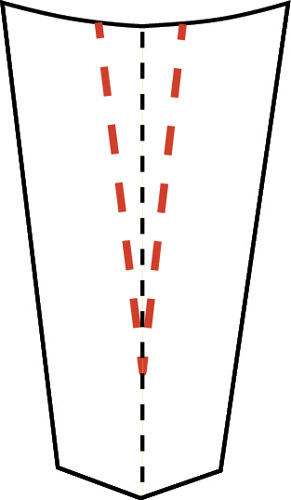
2. Trace the neckline, the center front line, and the depth of the V onto a piece of paper. Then, on your paper, mark a line ½” from either side of the center front line at the neckline, and join the lines with a ruler or straight-edge to make a V.
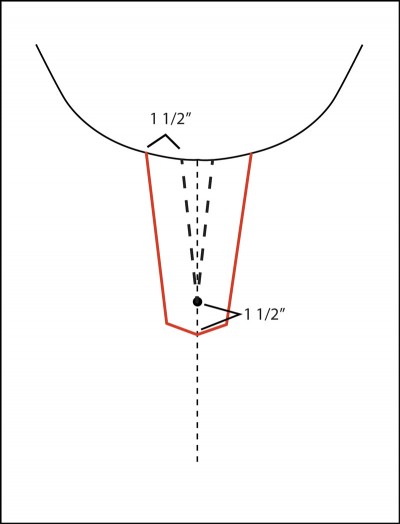
3. Mark the width of the facing, measuring out about 1 1/2″ from the V markings. I like to make a gentle V at the bottom of the piece to taper the end as shown. This will be your pattern piece, so cut it out and then cut a facing from your fabric using this new pattern piece. Transfer the center front and V markings to the wrong side of your fabric so it will be easy to match and sew the facing to the front of the blouse.
4. Finish the outside edges of the facing, keeping in mind that this edge may show when the blouse is worn. I like to give it a clean finish by first folding the edges to the wrong side by ¼”, and then edgestitching the innermost fold.
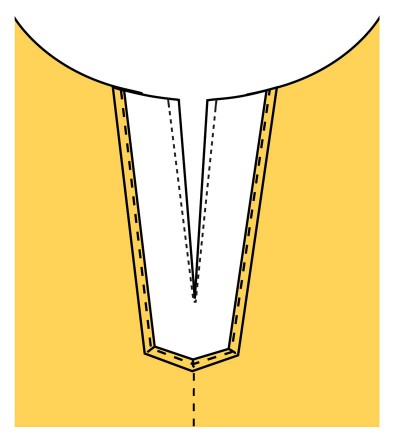
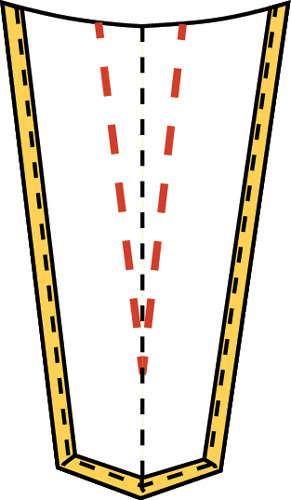 5. Now pin the facing to the front of the blouse, right sides together, and stitch along the V marking, pivoting at the tip of the V and taking one horizontal stitch before stitching up the other side. This little stitch will make clipping easier in the next step.
6. Once you’ve stitched, you can cut down the center front line through both layers of fabric—the front blouse and the facing—right up to the point of the V. Be careful not to cut into your stitches, but cut very close to them at the tip of the V. While you’re cutting you can also trim the seam allowances near the top of the V so they’re about ¼”; you won’t need the full ½” up there, and trimming them will reduce bulk in the finished neckline.
7. Turn the facing to the wrong side of the blouse and press it. If you’re getting any puckers at the V, you may need to clip a little closer to your stitching. Once you’ve smoothed the facing, pin it in place and edgestitch the facing to the blouse to finish it.
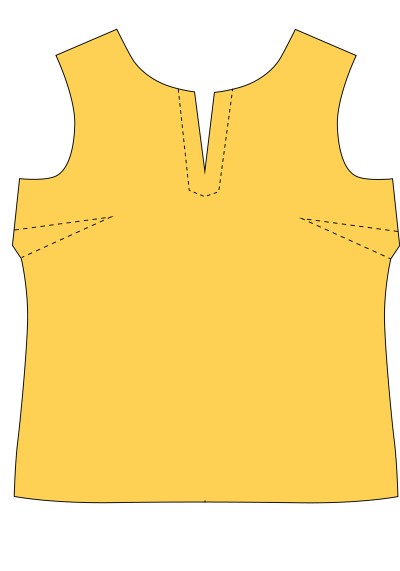
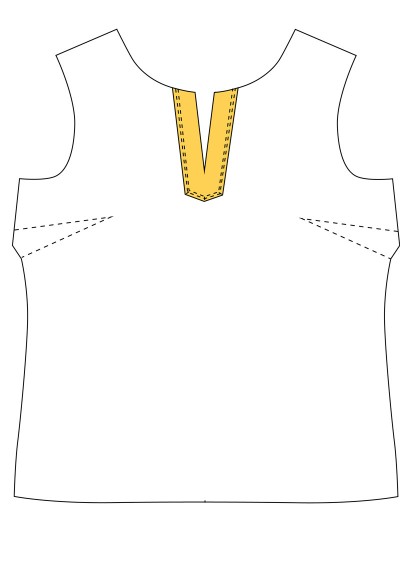 8. Now you can sew the rest of the blouse. When it comes time to attach the narrow bias facing at the neckline, give the facing edges a clean finish at the V by folding the short ends to the wrong side, flush with the edges of the V when you attach the facing.
I hope you’ll show off your finished blouses in the Lisette Flickr group, and now that you know how to make a simple facing you’ll probably find lots of ways and places to use it.



4 Comments:
Thank you, this is great and you modeled it very well. It is nice to see the pattern designer taking such pride in her work.
Love it! Thanks so much for the tutorial.
Thank you for such an easy to follow tutorial. My blouse is working out beautifully and I hope to have it finished soon and photos posted. Your generosity and encouragement to ‘get sewing’ is much appreciated. I love all the patterns!!
I loved these modifications. I made it out of another Lisette fabric and it wears great!